Get monthly coaching and support to FINALLY gain momentum in your business without burning out in the process. 🦄 Learn more about WAIM Unlimited.
We’ve been using Instagram since 2013 and oh how the times have changed.
Stories, filters, IGTV—it can be hard to keep up with all the new features (not to mention the algorithm). However, the first feature Instagram started with (Posts) has stood the test of time and will continue to be one of the most valuable parts of the platform.
In this article, you’ll find 14 unique Instagram post ideas that can help your content stand out from everyone else’s! Don’t know what to post to drum up engagement? Pick from this list and put your own spin on it to see what resonates with your audience.
Sound good? Let’s dive in!
We had to start with the Instagram OG—photos! Want to bring more life to your photos? Try using the markup app on your phone or apps like Procreate and Over to add illustrations or layers to your photos.
We love the way Arabella adds fun embellishments to her photos which really make them stand out next to a see of other photos in the feed.
We love using the app Over to add embellishments, so unsurprisingly Over’s Instagram account is a great place to look for inspiration!
Again, starting simple here because quotes are everywhere, but with good reason! Take a line from your best article or newsletter and turn it into a quote card with branded elements like we did here:
OR…you can take a page out of Amy’s book and keep the design super simple to let the words shine.
It’s the era of embracing cross-platform content! By using a design that embraces the status update layout of Twitter, you can grab someone’s attention with a longer quote.
Similar to the status update idea, this is about using digital tools we all recognize (reminders, emails, etc.) to enter your own custom message.
Refinery29 recreates a “compose email” set up here with their own brand fonts which is a uniquely compelling way to present a basic quote.
🔥 Tip: use an app like Over to insert a fun background image or pattern in your brand’s color story.
Think of a sentiment you want to communicate and what visual object or illustration could enhance the meaning.
Not the best artist? That’s cool. 🔥 Tip: You can still search for royalty-free illustrations or drawings online or with an app like Over and pair with text.
Artsy Affirmations could have included this text as the post, but the addition of the large scissors adds a nice visual element.
Already using illustrations? Take them up a notch by adding an animated element. 🔥 Tip: You can use an app like Procreate or Rough Animator to draw frames and export as an .mp4 video file for easy uploading to Instagram OR you can actually use Keynote to make a frame animation and export as a video as well!
You can use a cool app like Pixaloop to make parts of your images move, adding an eye-catching dynamic quality to your images. You can also use Google Photos automatic animation feature to take similar photos and turn them into an animated photo.

This is especially great for artists, but it’s not exclusively for them! People love seeing behind the scenes of how others work, so think about how you can share your process in a helpful/interesting way.
We love the way Gal Shir shares his illustration process in these gorgeous videos.
More and more people are using the multiple-image carousels to teach or inform. Think of it as a mini slideshow presentation. How can you share valuable content and tell a story? You can also the same functionality to share portfolio images.
An infographic is a visual way to express data or information. You could share steps in a process, statistics, or use a graph to share something relatable that makes your audience feel connected to you.
Spark Sustainability is using data here to promote conversation about climate change.
We love the way Liz and Mollie incorporate data visualization with relatable illustrations.
See a popular meme going around? Think about how you can customize it so it will be entertaining for your specific audience.
For example, The Everygirl knows their audience are mostly millennial women who will appreciate this Rachel Green from friends reference.
Look for reaction GIFs and add your own captions that are relevant for the kind of content you share with your audience.
🔥 Tip: You don’t have to go looking for reactions, you can create your own. Take a short reaction clip of yourself and add your caption.
Hello Sunshine used this popular reaction gif to relate to their audience about coming back to work after a long weekend.
Find a way to highlight awesome things your customers have said about your business in a visually interesting way.
This is a simple but effective execution from The Social Media CEO. Screenshot great comments or emails and put them over a fun photo background:
This works especially well if you have a physical product, but encourage your audience to share their own photos using a specific hashtag and you can repost (with a proper credit shoutout of course!)
The Start Today Brand does this with their Start Today journals, sharing customer images of the journals in real life.
If you want to create content that grows your visibility, the keys are experimentation and listening.
Try different types of visual content and see what your audience responds to. It might take a few different executions of each idea for you to figure out if it’s something you want to keep doing.
Here’s an example of the first micro-blog carousel (idea #9) we tried versus one that was created a few months later:

*The 10x growth in shares and saves proves that our IG audience has really started to enjoy these types of posts as we’ve continued to create new ones!
Look at other engagement metrics like saves and shares. A post might get low likes but a ton of shares, and that’s what you want to keep doing because it will lead to people discovering your business on IG.
Most of all, have fun with the platform, engage with your audience, and share content that feels right for YOU. 👍
**
Enjoy this post? Bookmark it for later by saving it to Pinterest!

Oh hello there 👋! The blind auction to purchase our first brand and website has completed! But GUESS WHAT? We’re making more Squarespace Templates… Enter your email below to make sure you don’t miss out on the next one!
We’ll be creating a fictional brand (complete with a logo and custom brand elements) and then selling the entire thing in a fun way.
We love branding, design, building Squarespace websites, sharing our processes, documenting the journey, making money in unique ways, and THIS experiment is bringing all of those elements together!
What started as a simple comment I made to Jason (“I think I want to get back into doing some design work”) has turned into the in-depth post you are currently reading. Jason and I knew we didn’t want to actually take on a client and deal with the back-and-forth nature of that relationship, as we did that for years and it’s not what we’re focusing on now. So instead, we asked ourselves, how could we get creative with this idea and do something different with brand and website design?
Watch the introduction video Jason and I recorded about what we’re calling Building A Squarespace Site from Start to Finish (or BASSSF, as Jason loooves to say):
In the next couple sections of this post, you’ll get to watch me break down every step as IF I were working with a client. I’ll be walking you through the processes I’ve honed over the years, which include:

We love doing things differently around Wandering Aimfully. We believe thinking outside the proverbial box can not only help you stand out but it can help you generate revenue. Well, we’re putting that belief to the test with this project.
At the end of this post, ONE person (or company) will be able to purchase the completed brand and Squarespace site. But, we aren’t just slapping a price tag on things, we have something fun up our sleeves.
If you enjoy projects like this, jump our email list so you don’t miss when we announce the next one:

Hello friends and welcome to the Week One update of BASSSF! 👋 If you were wondering, yes, Jason is constantly saying “BASSSSSSFahhh” around the house (not just in these videos).
As you’ll see in the mood board video below, I deviated from my normal branding process just a bit by starting with color palette inspiration and building out the mood board from that starting point.
If I was working with a client to build this brand, I would go through the steps that I layout inside Better Branding Course (our in-depth branding course included in our Wandering Aimfully membership #shamelessplug) to uncover the client’s Brand Story. This would include things like:
However, since I didn’t really have a business or person to inform my tone words, I was left to my own devices to come up with my own. Rather than pull five random words out of thin air, I let creative inspiration guide me to a color palette I thought was interesting and I assembled my tone words as I found each of my mood board images.
I know this project is supposed to focus on building a Squarespace website, but in my experience designing something just to “look good” isn’t fulfilling or challenging. In order to end up with a site that I felt could translate to a real business out there, I needed to know what “brand” my final website would be promoting.
Even if you’re a business with an existing brand you’re happy with, I recommend putting together a new mood board if you’re planning on refreshing your website. You may just find new details and design inspiration that elevates your final site that much more.
Once I had my mood board finalized, it was time to turn that into a brand that would inform the design of my website.
Many of our members inside Wandering Aimfully and those of you who read our content primarily fall into the category of “freelancer looking to also sell digital products.” I knew I wanted my final site to be able to serve an ultimate business owner who would need a way to both promote their services AND their products. So, I decided my placeholder brand is a “creative studio” who offers marketing consulting packages and an online marketing course. This, of course, could easily be swapped out for any kind of freelancer. A copywriter who offers writing services and a copywriting course, or a designer who offers design services and a design course. You get the idea.
For those of you who aren’t full-time designers, making the leap from a mood board of random images to suddenly picking out fonts and designing a logo is daunting. That’s why in this video I walk you through a process I go over extensively inside Better Branding Course called “building your visual vocabulary.”
Building a visual vocabulary simply means accumulating an understanding of how certain visual details translate to an emotion, tone, or feeling.
Why does a dark indigo watercolor painting evoke a sense of moodiness? Why does a skinny serif font feel traditional and delicate while a thick sans-serif font feels bold and modern? These are the connections you want to pay attention to and use them to build a rolodex of design decisions.
This will make it much easier to turn your mood board and tone words into a brand identity design (logo, color palette, typography, graphic elements, etc.)
In the Brand Styles video (below), you’ll see me speak to each of the tone words and what visual details in my mood board connect to those tone words. Then, you’ll see me take that detective work and turn it into a list of graphic elements or “building blocks” to formulate my brand.
You’ll see my tricks for testing out custom fonts and graphics before you buy them, and you’ll see me experiment with creating my own graphic elements based on the inspiration found in my mood board.
Here’s a look at the final brand board. Now that we have this completed, we’re ready to START the Squarespace website build next week!


Alright, we are back with another exciting installment of BASSSSF! Who’s ready to actually jump into Squarespace?!
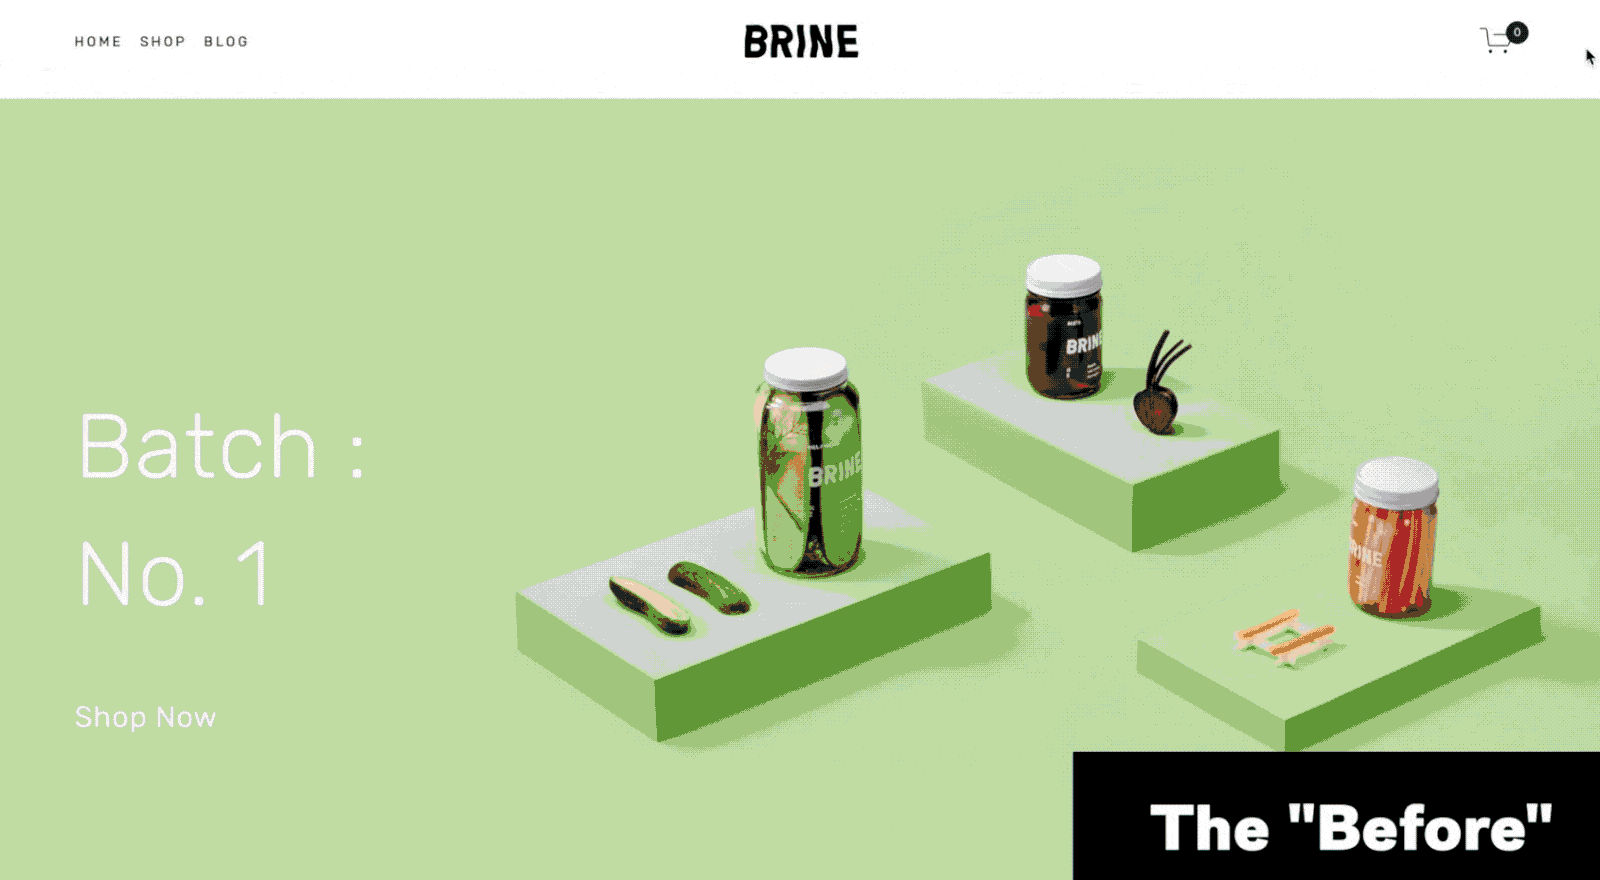
Now that we have solidified the brand, it’s time to bring that brand to life by creating a unique and custom website design. The first step in the process for me is to pick a Squarespace template and set up the basic pages in the site. Lately, I’ve been using the Brine Squarespace template because it has all the features and flexibility any small business could need and plenty of design options to choose from.

I took a few minutes to plan out what pages I wanted this basic site to have, as well as to brainstorm some ideas about what content would live on each page so I could make sure this site had the basic necessities a future owner would need to run their business. I also sketched out a VERY basic site map just to figure out what pages I wanted to have in my navigation. For a more complicated site, I would advise spending more time to think through the architecture of the site, but in this case, every page is basically accessible from the home page so it’s pretty straightforward. I did decide that I wanted to separate my pages into a primary and secondary navigation, just to keep the main options in the navigation as streamlined as possible and really lead users to the two money-making pages on the site, being “Work With Us” and “Course.”

With my site architecture decided, I easily add these various pages to my Squarespace site in the corresponding navigation sections. Before I add any content to those pages, though, there’s a very important step in the process I have to tackle: my brand styles page!
A very important step in the process that you’ll watch me complete in the first video below is creating a “Brand Styles” page in my Squarespace site. I do this before I ever layout any content on my pages.
For my Brand Styles page, I add all my headings and paragraph text (in index sections with a background banner and without), all the various image block style designs, and a few blog summary blocks. This way, I can take a half-hour or so to decide on which brand fonts to apply to my headings, how I want to apply my brand colors to various elements on the site, and I can install my custom brand font before I even lay out my pages.
Isn’t the Brand Styles page super fun??

Adding the creation of a Brand Styles page as a step in my Squarespace design process has been a GAME CHANGER. It allows me to apply my brand identity elements (fonts, colors, etc.) and style some basic content blocks before I ever start adding content to my pages. This does two things: 1) It saves me time from having to adjust my site styles every time I add a content block during my layout phase and 2) it reduces decision fatigue during my layout process because I’ve already decided on most of the visual styling. Plus, after the end of laying out the content on my pages and inserting all my content blocks, my site already looks incredibly “branded” and then all I have to worry about is final customizations and design details.
Once the Brand Styles page is created, the next step in the process is to actually add content to each page and decide on the overall layout—the order and arrangement of elements on the page. Again, before I ever hop into Squarespace I like to sketch things out just a bit on a loose wireframe. This allows me to see at a glance whether I’ll need text vs. images or any other visual components in order to communicate the basic things I want to include.
For the more complex pages that might require more information, I’ll turn those into “index” pages in Squarespace, which just gives you the ability to stack multiple sections on top of one another.
I start with my home page, sectioning out the content I want to include as needed and then adding the basic content blocks that I need. For example, if I know I want an image in a particular section, I’ll add an image block and play around with the design settings to utilize the different image styles that Squarespace offers. (This is also when it’s nice to have pre-branded elements thanks to our Brand Styles page stage of the process.)

I DON’T obsess over the final layout at this point in the site creation process. My only concerns are that a) all the content I want on the page has been added via content blocks, b) it’s in the order I want it scrolling down the page, and c) I’ve thought about arranging the position of elements in a visually pleasing way.
I do this for every single page of the site, adding text, images, buttons, and galleries where I see fit and making sure to include filler text and images so I can start to see the visual design of each page emerge.
Watch as I lay out the home page and about pages, and share some of my basic tips for this layout stage of the process…
Okay, once I had each page’s basic layout and content solidified, it was time to crank up the magic! This last phase of the process is where the design really starts to feel custom and one-of-a-kind.
These details basically fall into one of these three categories:
I use custom background banners to layer in my branded graphic elements and break up the recognizable “striped” look of a Squarespace template index page. Then, for my image blocks, I embellish my photos with things like borders or shapes to create a more custom and finished effect that goes beyond the standard website photo. And lastly, I pepper in small graphics and content separators to add unexpected moments between more standard layout elements like photos and text blocks.
Watch as I go through each of these design additions to customize the home page:
Pro-tip: I use the home page as a sort of sandbox to test out different design executions before jumping into any other pages.
Once I’m happy with the final home page design, that’s when I repeat those design executions in similar ways throughout the rest of my pages to make the whole site more custom. After all my pages are designed, that’s when I head back into my Squarespace settings and finalize every last detail like my favicon, styling the different add-ons like an announcement bar or email pop-up and optimize my designs for mobile.

Sound the trumpets, it’s time for the big reeeeveeeeeal! We are so excited to share the finished website for BASSSF and showcase the brand in action…
In that reveal video (not an HGTV show, sorry Jason) we talked in detail about the finished website, but here’s a list of everything that was completed in the final week:
WHEW! That’s quite the list of stuff to accomplish and make sure was branded and looking sharp.
Head on over to the Galactic Creative Studio website and click around!
You can also click this fancy image too…


If you watched the reveal video then you know we sold the entire BASSSF brand and Squarespace site using a blind auction. But if you didn’t watch the video, we simply held a blind auction where people submitted bids to buy the brand and site over a 5-day period.
Once the auction ended, we contacted the high bidder and started the process of payment and transferring all the goodies. And a friendly reminder: This was NOT a template or kit that will be sold again! Only ONE person/company now owns the Galactic Creative Studio brand and site 👍
Thanks for checking out our BASSSF project and we hope you enjoyed it! If you want to see more projects like this from us in the future, hop on our email list and stay tuned!
We all want our work to be high-quality and fully-formed right out the gate, right? It’s only natural.
Thankfully, though, over the past few years, I’ve seen a shift in conversation encouraging creatives to overcome this barrier of perfectionism. This conversation has given birth to ubiquitous mantras like: “Done is better than perfect,” “Aim for progress, not perfection” and “Start before you’re ready” — all of which is advice I can certainly get behind.
Personally speaking, perfectionism is actually something deeply rooted in my consciousness, being the over-achieving, academic kid that I was growing up. For the past six years, I’ve worked to overcome this mental barrier nearly every day, trying to create and share my work despite the voice in my head that naturally likes to point out every flaw or short-coming or opportunity for improvement.
Today I want to share with you one specific mental shift that helped me start to make that journey from perfectionism-induced paralysis to prolific production (holy P’s!), and it may just be one take that you hadn’t yet thought of.
It starts with a story.
My first job out of college was at an advertising agency in North Carolina. The office was in an old renovated tobacco factory, with industrial-chic brick walls and polished concrete floors. There was ping pong and shuffleboard, dry erase marker frenzied across glass walls, and a coffee bar at the center of the office to work and hang out with fellow co-workers. It was the epitome of what I imagined was a “cool place to work,” and I couldn’t believe I’d snagged such a coveted spot.
But there was a problem — I was so eager to get my foot in the door of the advertising industry and this “cool firm” that I ignored the fact that the only position they had available when I graduated was in the media department.
In short, this meant I spent my days formatting spreadsheets, running banner ad campaigns, and fielding calls from media reps at niche financial magazines. (You see where I’m going with this, right?)
I’d gaze longingly at the creative department that sat in the pod of desks nearby. I’d see them revising logo concepts and brainstorming wild campaigns and editing TV spots. I wanted so desperately to be there with them. Knowing inside the kind of creativity I was capable of and realizing that nobody else knew the potential inside of me inflicted on my heart a slow, desperate kind of suffering that’s hard to describe.
I would daydream about someone from the department marching over to my desk and asking little 22-year-old me: “Hey Caroline, I know you’re super creative and we could use a little extra brain power over here — can you come help us?!” It took me months to actually snap out of my delusion and realize: that is NEVER going to happen.
Why? Because I hadn’t given them any reason to.
“No one will know what you’re capable of unless you SHOW them.”
That’s the simple truth.
In an interview I watched recently, Glennon Doyle said this when talking about the feeling of envy:
“There’s nothing more painful than seeing someone else do something that you feel like you were meant to do.”
We’ve all had that feeling, right? You come across something another person had made and it HURTS. You don’t want it to feel that way but you can’t stop it; the envy creeps in. When that hot feeling of envy rises up in us, it’s usually because we’re actually mad at ourselves for not acting on the potential that we know is within us. We don’t want to feel the disappointment in ourselves, so we pass it off onto another person in the form of envy or jealousy.
Back in 2011, I was itching to start my own blog. I had SO much I wanted to say and share and create, but I couldn’t settle on a name and I had no idea how to customize my blogger template and I didn’t know exactly what I wanted to write about… so I just waited.
I waited for A YEAR. I waited until I finally paid attention to that hot envy I felt when I stumbled upon every favorite blog I saw, and I decided that it was time I stopped whispering to myself “I can do that” and I started proving it by putting in the work.
Again: No one will know what you’re capable of unless you SHOW them.
Don’t just expect people to sense that you’re a writer; start a blog or self-publish a book so you can show them.
Don’t just expect people to guess that you’re an artist; post those paintings on Instagram and show them.
Don’t just expect people to assume you’re musically gifted; publish those tracks to SoundCloud and show them.
Right now you might see sharing your work as scary, especially if you feel it’s not perfect. (Reminder: no one’s is.) You don’t yet have that perfectly cohesive Instagram feed or every page of your blog beautifully designed or each lyric of your song in its poignant beauty.
That’s okay.
With every new piece of art that you make and share, it’s like one more little beacon of proof showing the world (and, more importantly, yourself) what you’re capable of.
I guarantee you, if you simply BEGIN and you share consistently for just one month, you’ll start to experience the thrill of taking what is inside you that’s begging to be expressed, and letting it see the light. That is the soul’s ultimate feeling of freedom, and it’s better than any drug. (Full disclosure: I don’t like drugs, so that’s an easy comparison for me.)
The truth is:
Imperfect freedom tastes so much better than perfect confinement.
Imperfect reality feels so much better than perfect fantasy. (Because it’s real.)
Imperfect progress is so much more satisfying than perfect stagnation.
Your challenge this week is to identify what potential is inside you that you’ve yet to share.
What are you capable of that you can start SHOWING today. Then, make that plan and simply begin.
The tools that are available to us as creators have never been more accessible or more plentiful. Get out there and use them.
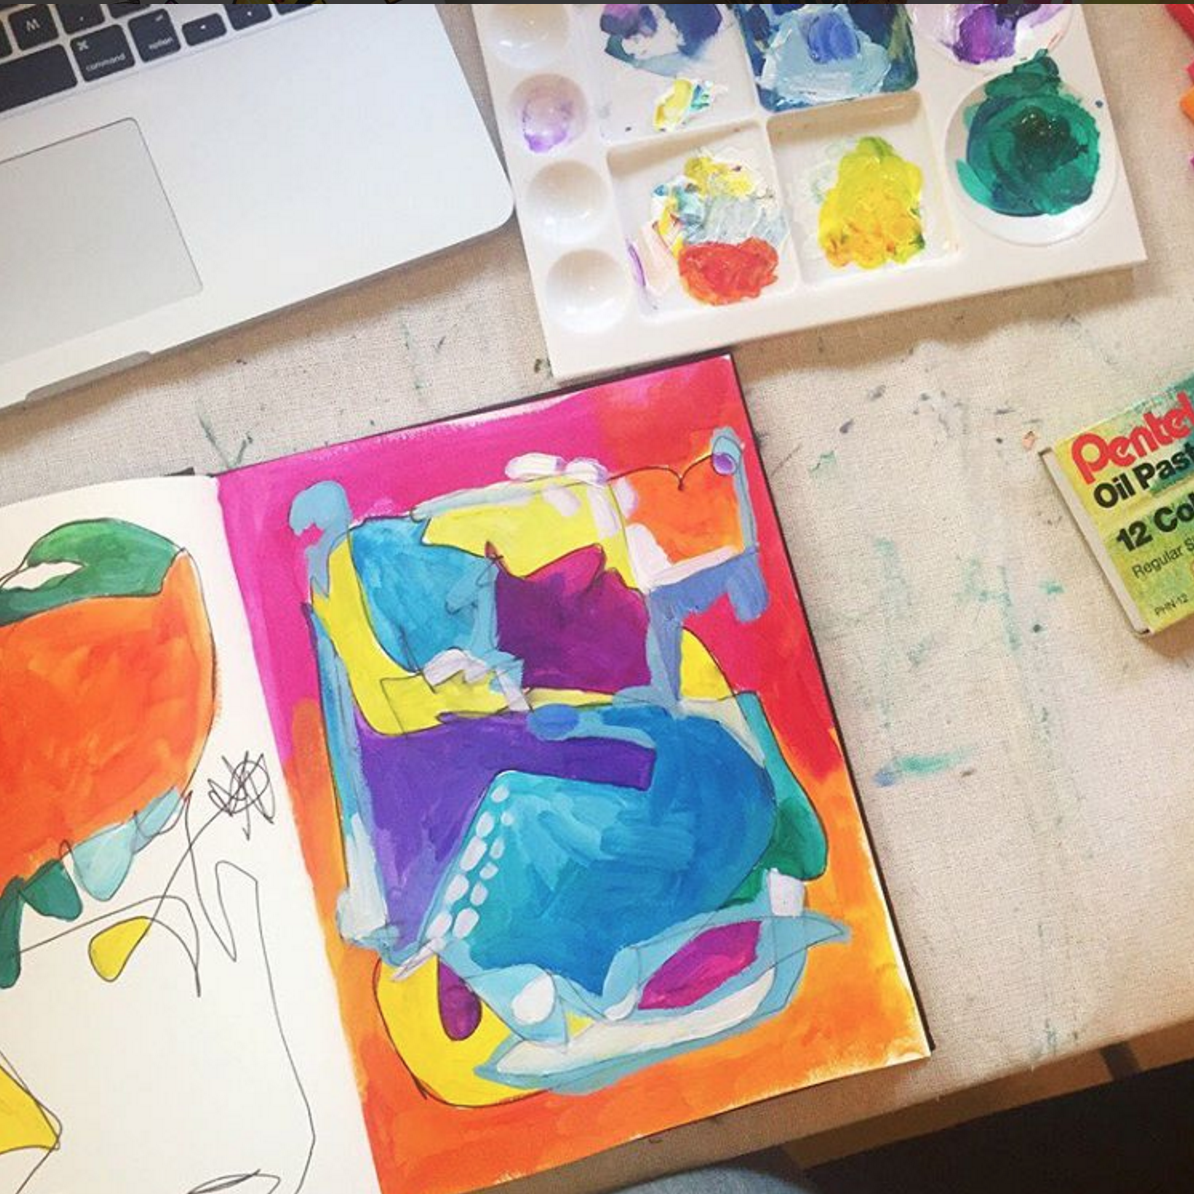
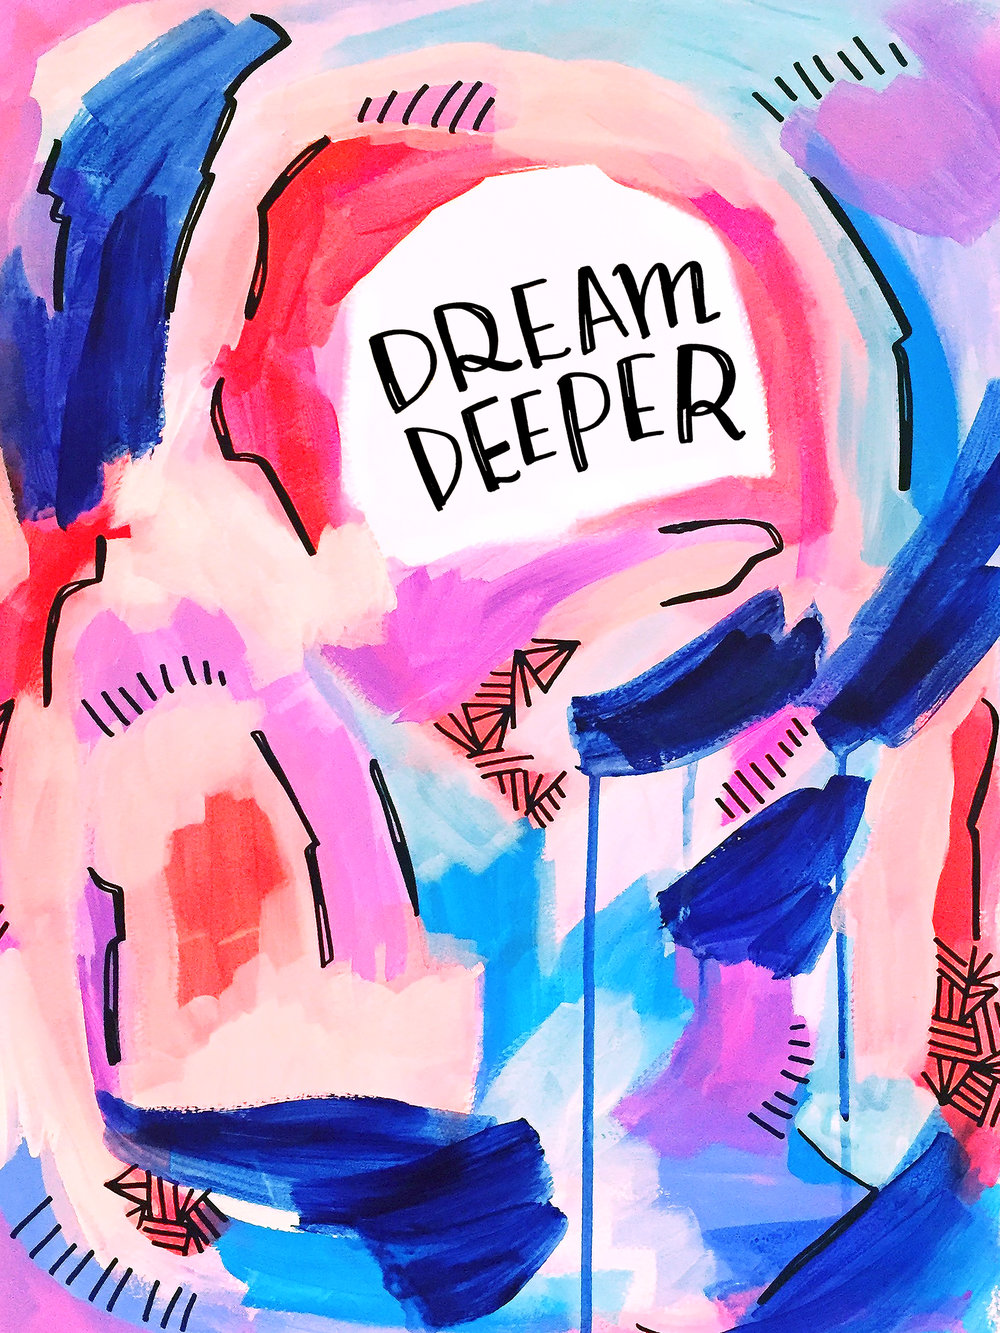
I had this dream of myself in a big studio, hands covered in paint, jamming out to my favorite tunes and dragging color around a canvas.
When I woke up, I pretty much high-tailed it to the nearest art store to bring my dream to life.
I had no idea what supplies to buy (or what to do with them), so I just grabbed a mixture of craft paint, professional-grade acrylic paint, a boatload of canvases and headed home.
I started my acrylic paint experiments by trying to paint images of objects I found online. I did my best to study the light and shadows and keep in mind perspective and proportion.
I felt so restricted by the process, and trying to paint with any semblance of realism was robbing me of the joy I experienced in my painting vision.
That’s when I started to explore the idea of going abstract with acrylic painting.
I was much more interested in things like lines and patterns and shapes than I was any particular subject. Still, I found myself intimidated staring at my blank canvas with literally infinite possibilities of color, pattern, shape, and composition.
For a while I just sort of sat, paralyzed, afraid to paint anything at all. I was afraid of creating something “ugly,” focusing WAY too much on the outcome rather than the process.
The only way to get over my fear of not knowing where to start was to start anyway.
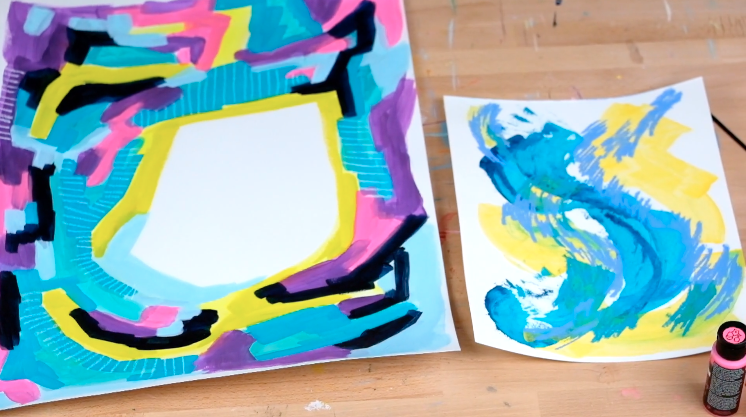
So I set up a small “studio” (read: table covered in a drop cloth) in our guest room and I began painting every day. I started small by experimenting in a mixed media sketchbook and trying out different brushstrokes, color combinations, and styles.


After I became more comfortable with the simple act of actually putting paint to paper (not just thinking about painting), I realized I still wanted to find MY unique voice.
My goal was simply to see how my own style would evolve and to try and uncover my unique voice through intentional daily practice.
(To give you an idea of that evolution, here’s a snapshot of the various styles I experimented with from January 2016 through September 2016!)


I’ve put together a beginner’s course to share my love of acrylic abstract painting! In the class I share my favorite supplies for painting with acrylics, as well as three different techniques you can use to create your own one-of-a-kind abstract art! Watch the Getting Started lesson below…
Acrylic painting been the most rewarding process, and I’m more convinced than ever that acrylic paint is an amazing medium to express your creativity.
In the rest of this article, I want to take what I’ve learned in my acrylic painting journey thus far and share some tips with you in case you too are itching to express your creativity through painting!
That first trip to the art store, wandering the aisles of Michael’s, I literally purchased about 20 small canvases to begin painting (thank goodness they were having a 50% off sale!)
In my head, at the time I thought “It’s not a painting if it’s not on canvas.” How wrong I was! You can paint on ANYTHING, but when you’re starting out, the most important thing is to choose something that is cost-effective AND not intimidating.
When you’re starting out, the most important thing is to choose something that is cost-effective AND not intimidating.
Canvases are unfortunately neither of those things.
I don’t know about you, but when I look at a canvas, it feels so permanent and so formal. That fear of “messing up” creates one more barrier between you and painting and that’s what you’re trying to avoid! Not to mention they’re not cheap.
My solution? Trade-in canvas for thick, sturdy watercolor paper when you’re starting out.
Once I made the move from canvas to paper, suddenly I was a lot more comfortable trying things and going through more painting experiments because I wasn’t as concerned with “messing up” a canvas. (Side note: there is no messing up in acrylics; you can always paint over it!)
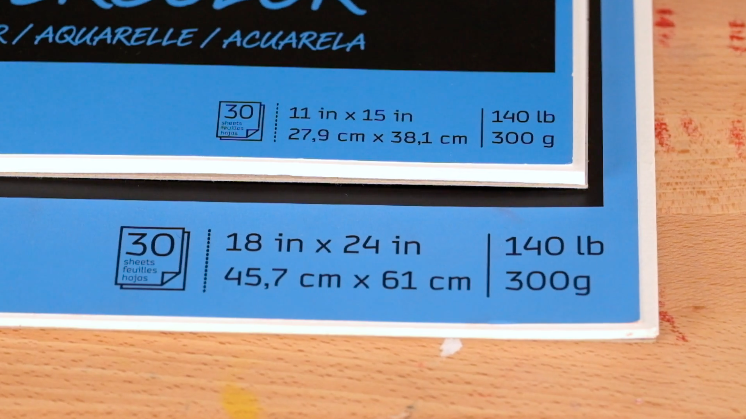
Paper feels more playful, disposable, and approachable, plus it’s more cost-effective. Depending on the size, I’m able to get a pad of 30 9”x12” pieces of paper for just $10, as opposed to $16 each for a canvas.
**IMPORTANT: If you do decide to pick up the paper, aim for at least “140 lb” paper. That number is a reference to the weight of the paper. The higher the number, the thicker or sturdier your paper will be. I’ve found that anything less (like 90 lb) just can’t hold up to the weight and wetness of your paint and it will bubble. **
Want an idea of something to start with? Here are some paper brands I’ve used and love!
When I started my daily painting project, I started by using these large 18″x24″ sheets of Canson Montval watercolor paper* which has a beautiful rich texture.

Since then I’ve switched to the Canson XL watercolor paper brand* which is still great quality, but it’s just a little bit less textured and happens to be more accessible as it’s available at Michael’s and my local art store. I’ve also gone down in size a few times (simply because I’m able to complete a painting more quickly) to the 11”x15”* and the 9”x12”*.
(FYI: links with * are Amazon Affiliate links and I get a small commission if you buy awesome art supplies through them at the same great price you normally get!)
Speaking of supplies, the next BIG tip when getting started with acrylics is to…
Like I said, when I started getting into painting, knowing which supplies to invest in was probably the most confusing part. I parked myself in a Michael’s aisle for about a half-hour wondering what paintbrushes I should get and what the heck the difference was between the paint in the “professional” section vs the “craft” section.
So let’s try to give you a little more direction, shall we? Here’s the biggest thing for you to know about acrylic painting supplies.
First and foremost, a HUGE disclaimer:
Everyone’s preference for acrylic painting materials is different.
Every paint has a different consistency, every brush has a different give and every paper creates a different texture. On top of that, every ARTIST (pst. That’s you!) has a different vision and spirit they’re bringing to their painting.
That’s why it’s so important for you to test a wide VARIETY of supplies so that you can see how each supply impacts your painting and the overall aesthetic of what you’re creating.
All that said, here are some basic things I’ve learned about the most important supply — paint — that may guide you.
First off, yes, you can totally mix “professional” grade acrylic paints with regular ol’ craft paint, but there IS a difference in the quality and consistency from the cheap stuff to the expensive stuff.
There are basically three categories that acrylic paints falls in: (1) amateur or craft paint; (2) academic or student level; or (3) professional or artist’s level paints.
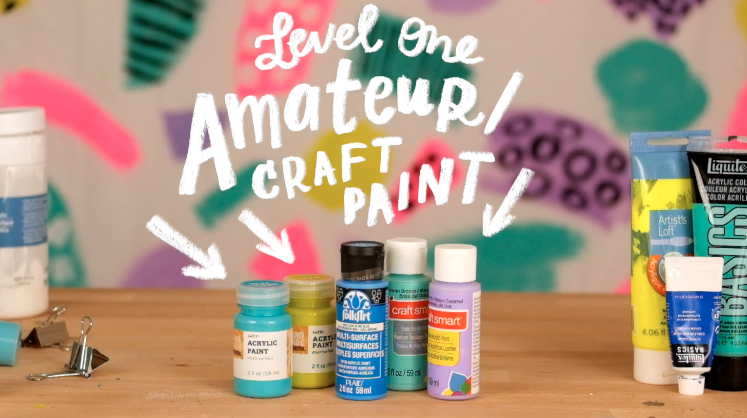
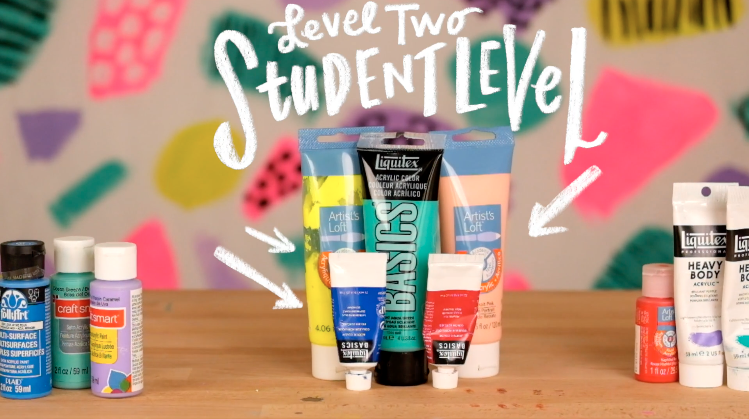
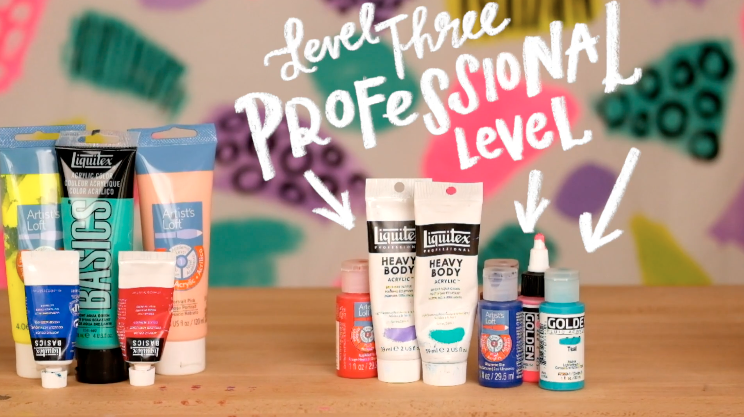
The main differences are in the quality of the pigment and the thickness/opacity of the paint. The higher you move up the quality spectrum, of course, the more expensive your paint will be.
So, what’s worth investing in? Well, I’ll tell you what I keep in my studio. The majority of paint I own is the first level — basic amateur craft paint — and that’s because I paint A LOT and I’m not too concerned with the long-term adherence of my paint to my paper or canvas.
I love craft paint because it’s cost-effective and comes in a wide variety of hues. I can also use it as a base to mix in my more expensive, higher quality paints, which makes them last longer in my studio.
One student-level paint that’s great to start out with is the Liquitex BASICS paint*. When I was beginning, I invested in a variety pack of the small tubes and that got me acquainted with the thicker, richer paints. Now I buy the occasional bigger tubes because I know what colors to go for, but if you’re looking for a middle of the road option to get started, it’s a good one.
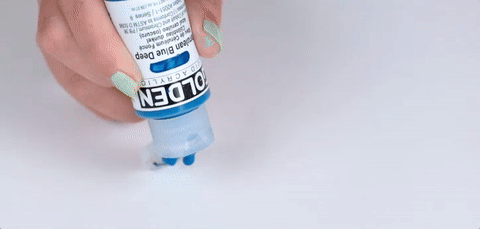
Finally, my two favorite paints I’ve experimented with are the Liquitex Heavy Body Acrylics* and Golden Fluid Acrylics* for two different reasons.
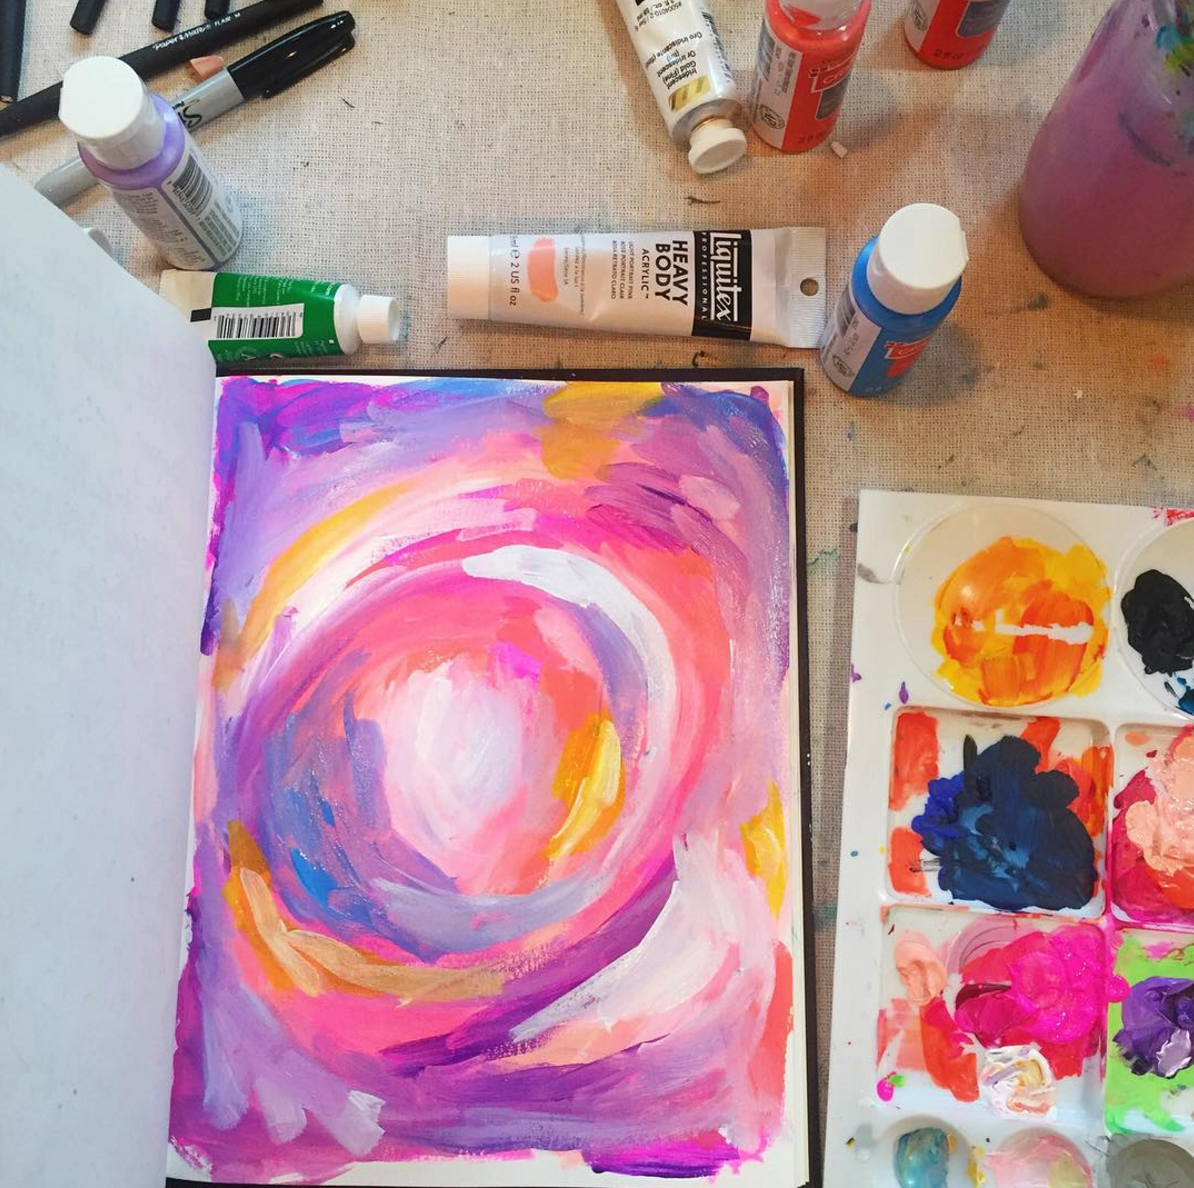
Texture of the Heavy Body Acrylics in action:

The Heavy Body Acrylics are rich and buttery and SUPER thick.
I love using them when I want a very strong, opaque color, and as I mentioned, I use them to mix with my craft paints to give them more weight and hold.
Texture of Golden Fluid Acrylics in action:
Fluid Acrylics, on the other hand, are very thin, almost runny, but the pigment is rich and velvety and strong.
This type of paint can create completely different marks than paint of a thicker viscosity and I love experimenting with it, especially to get that “drip” effect that you see in the pieces below:
Again, the only way to know what YOU like is to try out a variety of supplies. I recommend setting an introductory budget for yourself and getting a diverse range of quality levels and brands to find out what you love best.
I’ve put together a beginner’s course to share my love of acrylic abstract painting! I’ll walk you through my favorite supplies for painting with acrylics, as well as three different techniques you can use to create your own one-of-a-kind abstract art!

A few months back Jason and I were baking and I wondered if I could use wax paper to create texture on my paintings. I’ve been experimenting with wax paper in my work ever since and I’ve discovered at least 10 different ways to use it in my paintings to add texture and spontaneity.


Okay, once you have a wide variety of supplies in mind, you might be wondering… what color paints should I buy? Which leads me to my next tip…
I’m obviously a sucker for bright, VIBRANT colors. (What? You couldn’t tell? ?)

I’ve always gravitated to the energy and inspiration I get from colors that are very saturated, so I tend to scoop up just about every bright or slightly bright color I can find, and I steer pretty clear of earth tones and more dull or shaded tones.
As for you, ask yourself what colors you most gravitate toward not just in art but in life.
Do you feel connected to the tranquility and softness of pale pastels? What about the grounded boldness of dark and moody earth tones?
Look to your wardrobe and interior design style for clues.
What things do you find yourself loving when you’re in the home decor aisles of Target? Vibrant, bold throw pillows or earthy, rich accents?
Color ultimately reflects and communicates emotion.
Choosing what color palettes to paint with is your opportunity to do what resonates with YOU, and the beauty of abstract painting is that you don’t have to worry about your palette matching a certain subject or landscape.
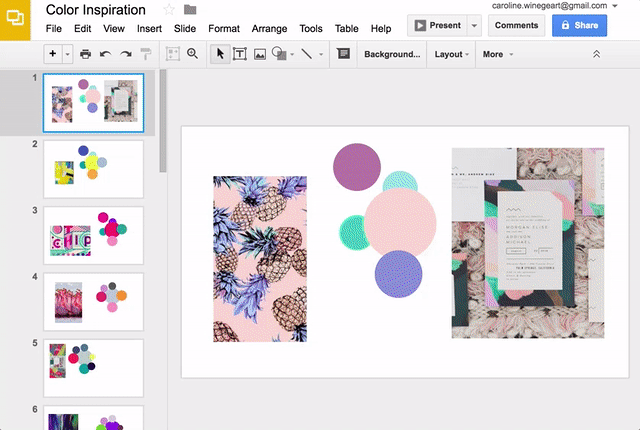
One fantastic tool for uncovering your color affections is Pinterest! Start a board of color inspiration and see what you start to pin. Then search your visual inspiration for color palettes that you may not have thought of on your own.

The thing about color is that there are literally INFINITE possibilities, and while I love to go with my instincts when selecting colors, sometimes I like to switch it up and pluck my palettes right out of inspiration I find.
For a while, I would actually build color palette mood boards, tape them up in my studio and then use them as inspiration in my abstract paintings. It was so much fun! I could interpret the color scheme in my own way. You can see examples of that here:

Sometimes I’ll also draw out color inspiration from one single photo. And the best part — you don’t need Photoshop to put these together! You can use a free and simple tool like a Google Doc/Google Slides presentation (like I do below) or a Keynote/Powerpoint presentation. (Pro tip: To get the colors from the photo, I use this Chrome extension, Eye Dropper.)
I just pull up this inspo doc up on my iPad while I’m in my studio if I want color palette inspiration!
Again, remember that color palettes, just like materials, will require experimentation and exploration. Your color preferences may change over time and that’s perfectly fine.
Still, starting with a general idea of what colors you want to buy/work with might help you overcome that overwhelming feeling that I had when I started out.
The ultimate tip to getting started with painting is simply, well, BEGIN! Forget whatever stories you’re telling yourself about what supplies you NEED (turns out, you actually do not need an easel to be an artist ?) or what you are or aren’t good at and just dive in.
The truth is, you can read articles (like this one) or do ALL the Google searches in the world to see how the “experts” do it, but ultimately you’ll never uncover your unique artistic voice unless you devote time to making things and putting in the practice.
You’ll never uncover your unique artistic voice unless you devote TIME to making things and putting in the practice.
Painting is such a beautifully therapeutic exercise and I really do believe that it has the power to heal and TEACH us things about ourselves that other things just can’t. It’s a way to express your feelings and instincts in a tangible, visible way.
So throw whatever judgments you have out the window, go to your nearest art store, grab a few things and simply START PAINTING. I know you’ll be glad you did!
Painting has been the most amazing gift in my life and it’s helped me see myself more fully as an “artist” — something I was always afraid to call myself before.
If you need a tiny boost to get started, sign up for Acrylic Explorations and I’ll walk you through my own painting process MUCH more in-depth. I take you through the materials in my studio and share with you three different acrylic processes from start to finish.
For just $35, you get:
+ Lesson 1: Welcome / Your Creative Mindset
+ Lesson 2: Class Supplies / In-depth videos on paints, paper, brushes and more.
+ Lesson 3: Basic Abstract Art Properties / Basics of Color and Color Mixing
+ Lesson 4: Let’s Paint! / 3 Different Abstract Art Techniques from Start To Finish
+ Lesson 5: Your Class Project
Click the image below to get started or click 🎨 here.

Hope you enjoyed this post, and remember…
After launching Color Your Soul—a project that was basically four months in the making—I had such a joyful feeling. It was so comforting and validating to know that this creative idea of mine was in loving, accepting hands with people who appreciated it. The warm email replies (especially from those of you that unhesitatingly jumped on board with this first issue and became subscribers!) were an incredible feeling.
Today, though, I want to get REALLY honest about the emotional aftermath of launching a creative project like Color Your Soul, one where so much of your heart is invested.
Truthfully I thought about not writing this letter at all, sticking to some safer topic that felt less raw. But, after thinking it over, I realized that you guys don’t read my writing for the sugar-coated stuff. I’ve always tried to share with you the REAL emotions and real insecurities behind running a creative, values-based business, and so today I wanted to honor that promise by keeping it real.
So here’s the truth:
Despite experiencing the highest high introducing Color Your Soul to you guys on Thursday and welcoming many of you as subscribers, I woke up on Saturday and felt strangely OFF. It was a feeling I haven’t had in a while, not necessarily one of sadness or disappointment but just of confusion, like this beacon of light I’d been chasing all summer was no longer illuminated and I was now fumbling around in the dark.
This isn’t how this is supposed to feel, I thought. I made the thing I’ve been dreaming of making! It’s alive and in the hands of people who appreciate it! So what is this strange feeling?!
It’s not that I was questioning my vision — I believe more than ever in the vision I have for this movement toward soulful, inspiring, thought-provoking content — and as I look at Color Your Soul and the canvas it’s provided me to go on making this kind of content for you guys, there’s no doubt in my mind it’s what I want to be working on.
So, if it’s not the idea itself then, what is it? Where was this sudden slump coming from?
I spent all day yesterday trying to sort through these emotions. I took my token beach walk to ponder the meaning of life (that’s not a joke, I actually do that), and I got really honest with myself, peeling back the layers until I hit on something that felt real.
What I decided was this:
I was experiencing a creative hangover.
“A creative hangover is the emotional aftermath of bringing a dream into reality. ”
There are two primary causes of a creative hangover. (Duh, bourbon and tequila. Just kidding… Or am I?? ???)
For months I woke up and I had a clear purpose: to get ready for the launch of Color Your Soul.
I had a guiding vision that provided a structure for each of my days and gave me something distinct to measure my progress against. This made my creative spirit feel safe and purposeful.
My friend Steph often refers to this as “chasing the carrot.” When the carrot goes away, there’s a feeling of aimlessness that settles in.
This weekend, even though my purpose was technically unchanged (work on Color Your Soul), the big guiding beacon of “Launch Day” — the carrot — was no longer there. That absence no doubt contributed to my weird and aimless feeling.
When you pour your whole heart and your true self into an idea or a project or some kind of brave leap, when you spend days or weeks or (in my case) months daydreaming about it, you inevitably create a version of it in your head that feels real.
You spend so much time and invest so much of your emotional resources imagining it, that a part of you just assumes the reality will match the fantasy.
But, we all know that the reality NEVER actually matches the fantasy (that’s literally the definition of a fantasy — it only exists in our imagination.)
When I experienced the high of launching last week — a mixture of joy and relief and excitement and anticipation — all of those amazing emotions fit the vision in my dream BUT they weren’t sustainable, not at those levels anyway.
After the high faded and my heightened state started to even back out this weekend, suddenly I became acutely aware of how my reality contrasted with my dream.
Think about it: we never fixate on visions of ourselves having a perfectly humble, mundane happy day; Instead, our dreams and fantasies tend to feel grand and elevated. It’s no wonder reality can often seem pale in comparison.
That dissonance — the disconnect between the grand vision I’d fixated on for months and the happy-yet-humble satisfaction of reality — caused a sort of emotional reverberation, my creative hangover.
This concept doesn’t just apply to some big project like I’m talking about, but I think it could be any big event in your life, any vision you’ve been working toward.
Once you reach that milestone and the high of it wears off, often you can be left in a strange emotional limbo.
For me, it was a matter of first becoming of aware of it and not feeling guilty over it. For a moment I thought to myself, “Snap out of it, Caroline, you made the thing you wanted to make and you should be elated!”
Criticizing yourself for your emotional response is never productive, at least not in my experience.
Once I recognized this creative hangover for what it was and realized it didn’t say anything about me OR about my love for Color Your Soul, then I just shifted my focus back to the long game. I let go of the fantasy of “Launch Day” and set my sights on a more sustainable, more reality-based vision — one where I’m not building up some grand to-do or chasing down another carrot, but instead, I’m reminding myself to aim for what’s sustainable. To recalibrate my emotional measuring stick to a range that’s much closer to the everyday kind of happiness that comes with doing work that’s deeply fulfilling.
It may not be the grand stuff that daydreams are made of, but it’s REAL and it’s rich. It can be that normal happy day where I get to continue to work on the thing close to my heart, serving people close to my heart (hint hint: that’s you!)
Have you experienced this emotional, creative hangover? A project or event or big leap that left you feeling a little lost or dazed afterward?
If so, how were you able to navigate that experience and how can you emotionally recalibrate your own expectations so that you find satisfaction in reality, however that feels? Let me know in the comments!
The reason I wanted to share these feelings with you all is to show you that no matter how long you continue to make things, no matter how many years you get under your belt running a creative business, there is always more to learn and further to grow.
Even if you do find the courage to MAKE THE THING (which is half the battle!) there will always be unfamiliar, often uncomfortable feelings to navigate, and that’s just part of the gig. Creativity at its foundation is an emotional pursuit.
In 2016, I had this vision for a creative hybrid subscription of sorts. I wanted it to be part magazine with rotating content around a central theme; part online learning hub with new classes added on a monthly basis; and part exclusive art gallery where I could make a collection of art with a central message and share it to a group of art lovers that would appreciate it.
I called it Color Your Soul.
The only problem was…
What do you call a thing like that? How do you EXPLAIN a thing like that? And finally, the doozy-of-a-doubt that shows up for me on the regular:
Those are the questions that continued to bubble up as I took each and every step toward making my idea a reality.
Have you ever experienced that feeling before?
Have you ever fallen in love with an idea that felt unprecedented in a way?
Maybe it’s a weird business idea that you just can’t shake or a really specific niche audience you want to reach or your own hacked together way of designing something or an art style that feels strange but also kind of wonderful…
It creates in you a feeling like you’re floating out in the middle of the ocean—no one’s paper to glance at, no one to ask for advice, no one to walk ten steps ahead and make sure you don’t fall down a well. It’s just YOU.
Well, here’s what I’ve learned about that feeling.
Even though it can feel vulnerable and risky and kinda lonely and TOTALLY scary, it can also be a beautiful sign that you’re actually creating from your most authentic voice.
I forget sometimes that I actually live with the king of crazy himself, Mr. Jason Zook, who among other things has sold ad space on his chest, sold his last name, and most recently has sold his future.
In response to each one of those ideas, multiple people told Jason they either a) didn’t understand the idea or b) knew the idea would never work.
And you know what? He did them anyway. Why? Because that’s who he is. Jason’s authenticity lies in constantly doing things that push the boundaries and that challenge convention.
When I feel myself doubting any of my ideas that I’ve come to love so deeply even for one second just because it feels new and different and weird, I think of Jason and I’m reminded that different is memorable. Different is authentic. Different is original.
So let this article be a permission slip to you (and also to me):
“Create the thing that only YOU can create. ”
Create the thing that is so true to who you are and what your gifts are and what you feel compelled to make that it’s impossible for it to exist because YOU haven’t made it yet.
Go after your unique vision even if it feels weird and scary and completely unknown because that just means that the payoff of creating it will be that much greater when you see your vision come to life.
Not only will you have the distinct pleasure of making something you’ve been dreaming of and following through on your idea, but chances are that it’ll be the idea that makes people sit up and pay attention because it will be 100% YOU.
Creating is a scary and exciting thing, and I, for one, wouldn’t have it any other way.
I asked you guys what questions you were most curious about when it comes to my artistic process, my Abstract Affirmations Daily project, and opening up the MV Art Shop.
I got some great questions on Instagram so I decided to create a few Q&A videos to answer my favorites!
One question I get asked a lot is…
In the video below, I’m in my studio showing you first hand what brands I love to use, plus my super secret weapon: the best white paint pen of all time.
Click play to give it a watch!
+ Liquitex Heavy Body Acrylic Paint (Turquoise Deep)
+ Golden Fluid Acrylic Paint (Cerulean Blue Deep)
+ Folk Art Multi-Surface Craft Pain (Bright Pink)
+ Sharpie Permanent Markers, Fine Point, Black, 12-Pack
+ Paper Mate Flair Felt Tip Pen, Medium Tip, Black, 12-Pack,
+ Uni Posca Paint Marker PC-3M, Black, 3-Pack (Japan Import)
+ Uni Posca Paint Marker PC-1M White, 3-Pack (Japan Import)
Click here to view the whole playlist over on YouTube! If you have any other questions you want me to answer in another video, feel free to drop it in the comments!
When I started the process of researching how to turn this #AbstractAffirmationsDaily art project into prints, I was incredibly surprised to find that there is a staggering lack of information out there on how artists have been able to turn their creations into tangible, sellable items.
Trade secrets, perhaps? I don’t know.
What I do know is that many of you out there are creative people with an interest in making money doing what you love. (And I’m of the opinion that the world is a better place when more people are able to make money doing what they love.)
That’s why I want to offer this ongoing blog series, #SellYourArt. (Simple and to the point, yes?)
Throughout this series, my hope is to pull back the curtain a bit using my own experiences and report back on what I’m learning as I work toward selling prints of my artwork in the Made Vibrant Art Shop. Maybe it’ll help some of you take the plunge and start selling your art too!
Here are a few articles you can expect in the #SellYourArt series:
+ How to choose which platform to use to sell your art
+ How to estimate your business costs to see if your project is financially viable
+ How to choosing a printing method for your art prints
+ How to launch your shop using pre-orders
Let me just reiterate: I’m learning all of this for the very first time! I’m sure there are some of you out there that have experience selling your art online, and I hope we can start a helpful dialogue in the comments so that more makers out there will feel confident in getting their art out into the world and making it a financially sustainable part of their lives.
Now, on to the info!
Last week I shared with you the launch of the Abstract Affirmations blog feed to house each daily art piece and post.
The purpose of that was both personal — I wanted a place to see the entire collection together — and strategic — it’s important to build visibility and buzz for your work if you want to create enough demand to make money from a shop.
In this post though, I want to share with you the first few steps I took in the journey to launching the Art Shop, beginning with figuring out what platform to use to host my shop and handle the printing/order fulfillment of my art prints.
Based on my limited consumer knowledge, I saw my options for selling my art falling into three slightly different buckets:
As I considered each option, I saw definite benefits and drawbacks to each, which I’ll list out for you here:
Pros:
Cons:
Pros:
Cons:
Pros:
Cons:
So, what were the defining factors that led me to Option 3?
When it came down to it, I value having maximum control over the buying and shipping experience. I want the entire process to feel like Made Vibrant through and through, from the buying experience to getting your package in the mail. And I’m willing to take on the risks associated with that because I also highly value learning. I know that things are almost guaranteed not to go according to plan but I look forward to facing those challenges and adaption (and sharing every bit of it with you guys!)
I also feel comfortable enough with the audience I’ve built up on my own through this email list and on Instagram that the allure of using a third-party site wasn’t enough to persuade me to take the experience off my website and onto another. If I was an artist just starting out with no audience, I think I’d probably choose Option 1 or Option 2.
Anyway, I hope that helps some of you with the same big looming question I had in the beginning: Which platform do I use?
Of course, this was just one decision in a whole string of decisions I had to make when it comes to selling my art, but I look forward to sharing that with you guys in the coming weeks!
Next up I’ll be sharing with you how I estimated my costs and revenue before embarking on this endeavor so I could make sure selling my art was a sound investment of my time and money.
Side note: thanks to Self-Made Society email subscriber and artist Kristin Cronic for replying back to one of my emails with the RedBubble/FineArtAmerica options which made me realize I should go over these platforms more in-depth!
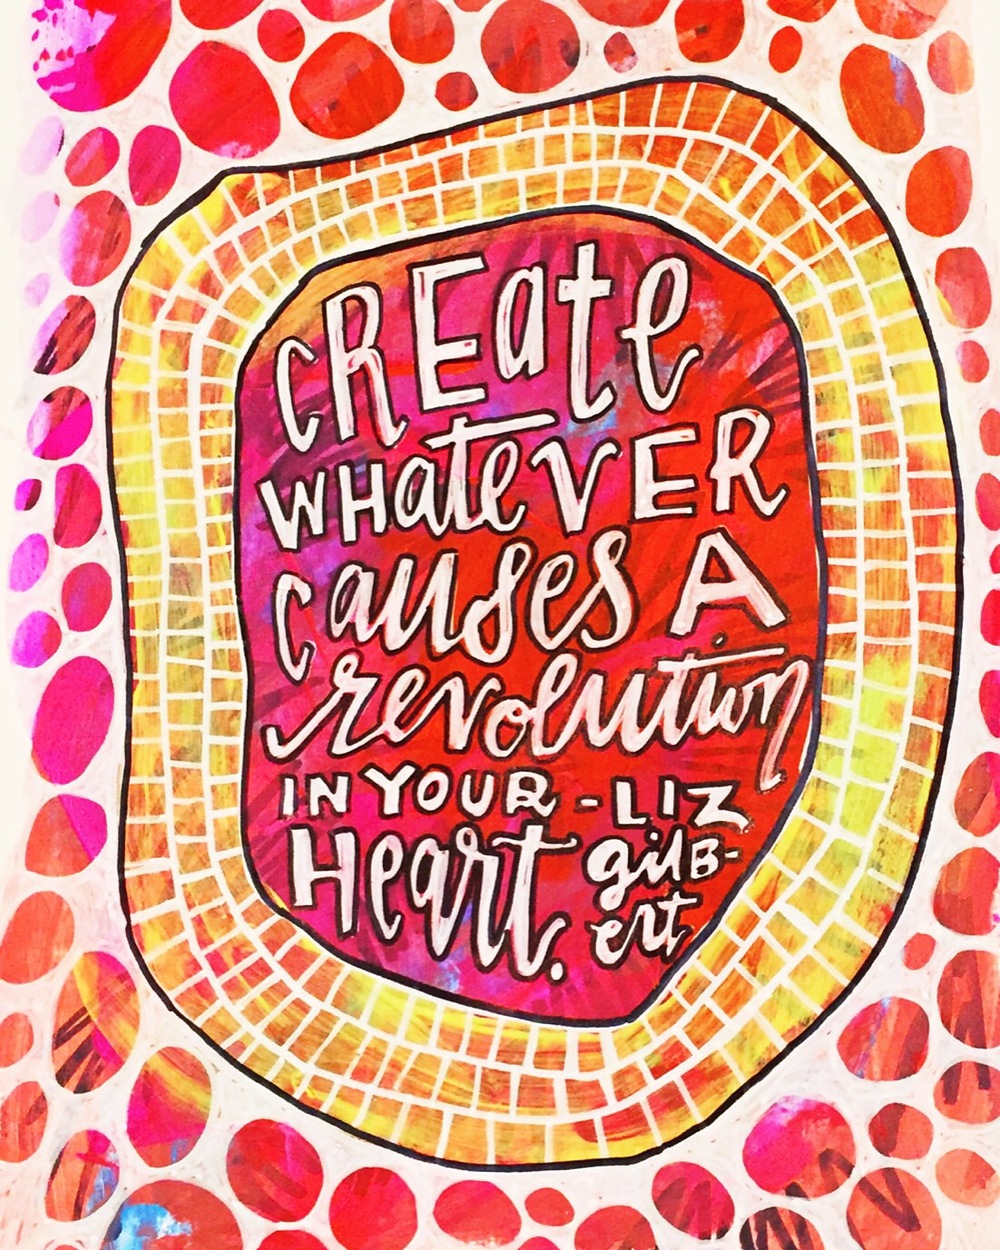
Elizabeth Gilbert — author of my favorite book of 2015, Big Magic, a complete treasure of a writer, and soulful creative through and through — used my #BetterLetteringCourse art journal piece from yesterday to accompany one of her beautiful, thoughtful Facebook letters this morning. (If you’re not following her page, I highly recommend it. She regularly shares article-length posts with gorgeous insights on life and creativity.)
Anyway, aside from geeking out over a personal idol of mine sharing my work, I was even more grateful to have my work accompanying a sentiment so near and dear to my heart: the idea that CREATIVITY IS FOR EVERYONE.
Art is not about the product, but about the process. It is about what you learn, what you become, what you awaken to throughout the magical endeavor of creating. I believe that with all my heart and it is beautifully expressed in Liz’s words which I’ve copied for you here, highlighting my favorite passages (warning: it’s long but so worth reading!):
BIG MAGIC MONDAY
Dear Ones –
So grateful to the artist Caroline Kelso for making me this beautiful imagine, of a quote from Big Magic. (If you want to learn more about Caroline’s lovely work, click here for further awesomeness: http://www.madevibrant.com/)
Caroline’s design here is a a good illustration for something I’ve been wanting to talk about since I got home from book tour a few days ago.
I keep trying to think of the takeaway of these last few months on the road with BIG MAGIC, and what keeps coming to mind is this one challenging question that I faced back in September, from a reporter who asked me, “Aren’t you afraid that your book is only going to encourage a lot of talentless people to fill the world with even more shitty art?”
WHOA!
I was staggered by his question. (To be very honest, I was torn between wanting to give him the finger, and just wanting to give him a big hug, and say: “Who hurt you, son? Who did this to you?”)
Because the gulf between his world view on creativity and my world view on creativity felt like the Grand Freakin’ Canyon — and I wasn’t sure how to even begin bridging it.
I was struck by the anxiety and fear (and, frankly, insecurity) that lingered behind behind this man’s query. I’m accustomed to people saying that they are afraid to explore their own creativity because they’re afraid their work might not be good enough…but this was the first time I’d heard someone say that he was afraid OTHER people might explore their own creativity — because THEIR work might not be good enough.
That’s a whole lot of fear about other people’s lives, baby.
And because of his fear, this man wanted to make sure that the realm of creativity remain CLOSED — restricted only to the special, the talented, the precious, and the deserving.
But here’s the problem: Who gets to decide who is deserving? Who gets to decide who is special? Who are the “wrong people” for creative living, and who are the right people? Who gets to play gatekeeper here?
After taking a few deep breaths, my answer to the reporter went something like this: “My concern is not that the world is filled with bad art — and I’m not even sure that the world IS filled with bad art, by the way. My concern is that the world is filled with millions of people who don’t create ANYTHING AT ALL, because they have been told that creativity does not belong to them. My concern is that those people are being denied an essential ingredient of their humanity, and that they are therefore reduced to being mere producers and consumers, rather than being makers — and this cannot be good for anyone.”
Because here is what I believe with all my heart (and after meeting so many of you over the past three months, and after hearing your own stories of creative discovery, I believe it more than ever)…I believe that:
Creativity is our shared human inheritance. Which means that everyone is invited, at all times. Absolutely everyone.
Creativity offers us ever new ways to unfold ourselves, to renew ourselves, to calm ourselves, to challenge ourselves, to explain ourselves to the world, to escape the world, and to alter our environment (both internal and external.)
The act of creativity is good for us — even if the final product is not “good” at all (whatever “good” even means in this context.)
Creativity is about the process, not the product. As my dad says about his Christmas tree farm, whenever anyone asks him how holiday sales are going: “The more important part for me is what happens the other eleven months of the year.” And what DOES happen the other eleven months of the year? My dad gets to cultivate and create beautiful trees, which he loves doing so much that it always causes a revolution in his heart. My dad gets such rich personal satisfaction from the process of cultivating and creating trees that it keeps him happy all year long. What occurs in December (selling or not selling the trees) is totally secondary.
Creativity is worth exploring, then, even if you never make a fancy living from it, even if you never win big prizes for it, even if you never show your work to anyone. It’s worth doing for what it does to YOU — not for how it lands on the world.
The most interesting part of creativity to me the stubbornness and love involved, not the level of talent (whatever “talent” even means, in this context.)
Creativity is about having the courage to try something new, even if you’re not sure it will work.
Creativity is about becoming a scientist of your own experience, and returning to the laboratory of life again and again, to tinker around with different ideas.
Creativity is about becoming an active participant in your life — even if it’s only in a small and modest way — rather than just being a passive witness, as life happens to you.
Creativity is about choosing curiosity over fear — not just once or twice, but again and again and again and again…
Creativity is a way that we can leave a tiny handprint on the walls of our lives, proving: “I was here. I made a thing. I did this.” It doesn’t have to be Mozart. It doesn’t have to be Van Gogh. It doesn’t have to be monumental to be monumental. Creativity is one of the best ways we can prove to ourselves that we did not just come to earth to pay bills and die, but that we also came here explore the mysteries of expression — and to be unreasonable, whimsical, searching, curious, gorgeous, and sometimes just plain odd.
Creativity is one of the most effective ways to cause a revolution in your own heart.
Creativity is for everyone. Your ancestors did it; my ancestors did it; and I hope to God that you and your descendants will all do it, too.
Don’t ever let anyone tell you that you don’t belong in the realm of creativity, or that you aren’t invited. And don’t ever let anyone ever project their fears and insecurities about their OWN creative existence on to YOU.
Just keep making your own thing, and watch what happens to your own beautiful life as a result.
So that is what I believe.
CREATIVITY BELONGS TO YOU.
You are all wonderful, and I love you, and thank you for everything that you bring to me and teach me…
ONWARD,
LG
But seriously, can I get an amen?! As I read that this morning, I wanted to climb through my computer screen and give Liz a big hug for putting words to something I so fundamentally agree with in my bones.
While I’m not sure I could ever communicate this idea as beautifully as Liz does here, it is a topic that I want to echo for you all today because it is that important.
It reminded me of an article I stumbled across months and month ago called “The Mediocre Movement” about the saturation of hand-lettering and typography inspiration in art and design. In this Medium post, the author pretty much posits that our collective taste level for design — especially hand-lettered typography — is on a rapid decline. That we should be more discerning in who we support and what we deem to be inspiring or great.
I remember reading this article, my heart level increasing with every word, and thinking, “Okay, but WHY? Why must there be an objective standard for what art is deemed good and what good does it do to discourage people from expressing themselves through art?”
It’s this very thinking that prevents SO many people from even embarking on the creative journey in the first place. It is this “not enough” mentality that feeds our pre-existing fears and prevents us from experiencing the transcendent joy of creating and stretching and growing and expressing.
Listen, I understand where the sentiment comes from. The author of that piece is clearly passionate about design and art and beautiful things and he wants to protect his idea of what that is in our society. I can’t blame anyone for wanting to protect what they love.
However, do you know what is more important than beautiful things?
Beautiful people. Beautiful lives. Beautiful experiences.
A world filled with people who love themselves and share their stories and are generous with their experiences. A world full of wonder and discovery and possibilities, not standards and rules and exclusion.
I know from experience that creativity, expression, exploration, delight, self-love… these are the building blocks of beautiful things — things that aren’t things at all.
Creativity belongs to you. (And don’t you EVER forget it.)
It is your human right to create. And whatever comes of it — whether deemed “good” or “not so good” — is irrelevant.
Please, for ALL of our sakes, “create whatever causes a revolution in your heart.” 🙂
Whether you’re a writer, an artist, an entrepreneur, a musician, or any other creative type, I’m betting you’ve fallen into the comparison trap at some point or another.
You know the game, don’t you? The one where you look around and wonder to yourself, Where in the world do I fit into this sea of talent?
—. The perspective that people will come to know you for. BUT, you don’t know where to start.
I remember when I finally decided to start my own personal blog back in 2011, I would read some of my favorite blogs and think, They have such a distinctive writing voice. I wanted that for myself.
The following five tips are the ways that I’ve been able to uncover the unique creative voice inside myself, and I hope they serve as guideposts for you to do the same.
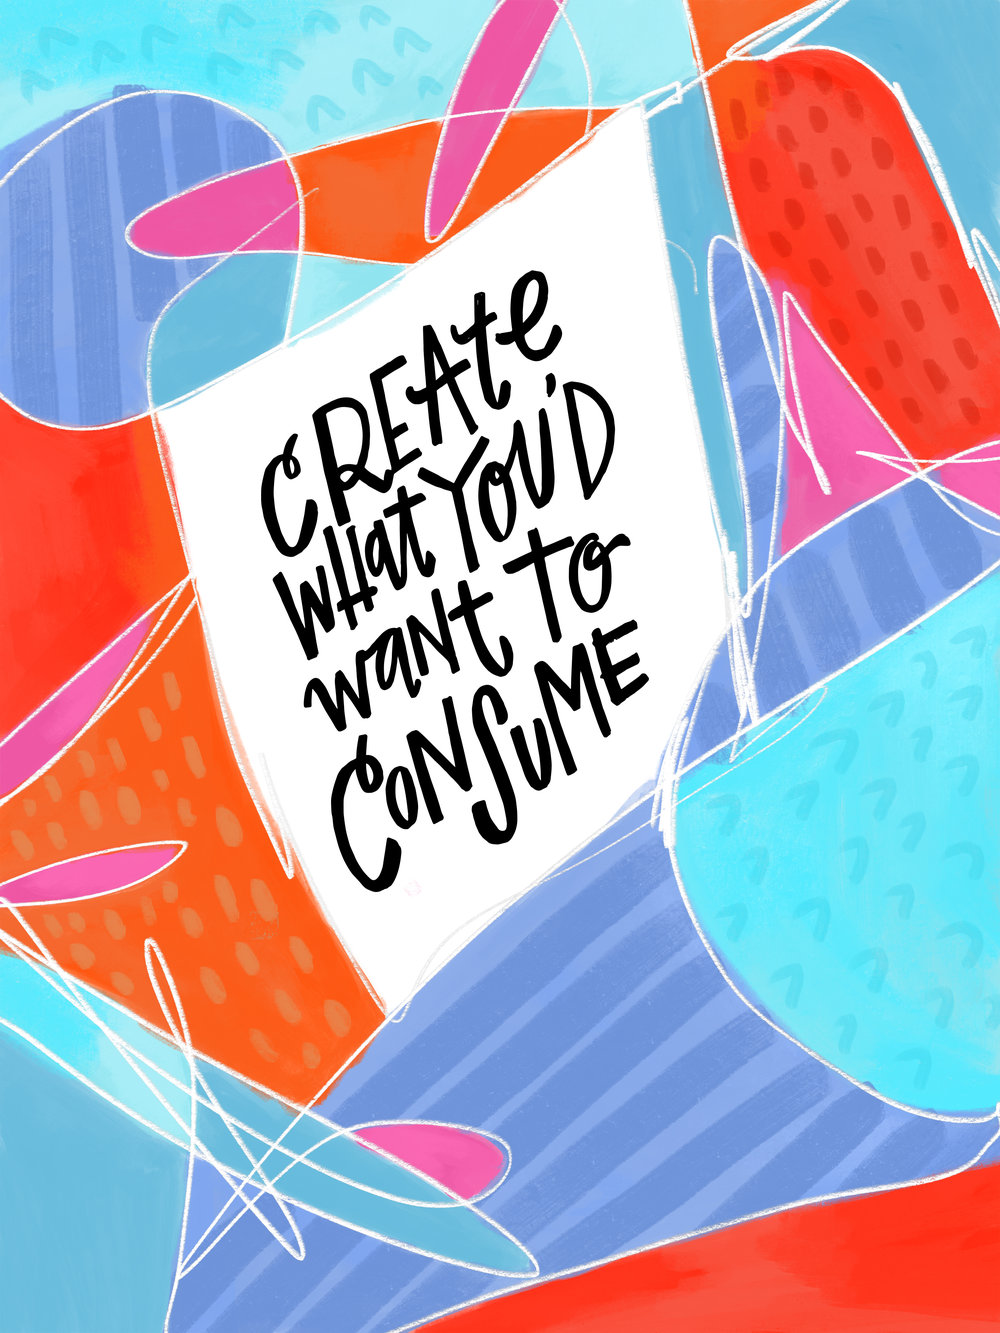
This is probably the most important point and the one from which the rest all stem. Consumption can be a great thing because it gives our creative brains some fantastic stuff to chew on—inspiration to form future connections.
However, if you’re heavy on the consumption end of the spectrum – in other words, if you’re taking in more than you’re putting in – you’re going to clog those creative parts of your brain with other people’s work. If you want to discover your style, the simple answer is this: make more stuff. And certainly, at the very least, make more stuff than you see or read or analyze.
This one is probably an extension of the former point, but more specifically, you have to crack down on the inner comparison glutton in you.
“Limit your temptation to imitate by removing your opportunities to consume.”
Listen, I get it, this seems counterintuitive. If you’re an artist and you like the work of another artist, you’re going to want to follow them on Instagram. If you’re a blogger, you’re going to subscribe to the blogs of other writers you enjoy. BUT, what I’m suggesting is that until you feel you have a handle on what makes you unique, it’s in your best interest to unfollow, unsubscribe and cut the inspiration from your life. Temporarily, I promise. Only until you find security and confidence in your perspective.
When I decided I wanted to start a weekly newsletter with inspiration and action on how to grow in business and in life, do you know what I did? I unsubscribed from every inspiring newsletter that came to my inbox because I had to discover MY voice and I knew that if my email was constantly being flooded with reminders of someone else’s voice, it would prevent me from moving forward.
Consistency is key when you’re trying to cultivate any sort of creative discovery. I truly believe that your voice shows up when you create momentum for it to arrive. What did Picasso say?
“Inspiration exists, but it has to find you working.”
Yes, a thousand times YES!
Jason and I are big fans of 30-day challenges because we feel 30 days is long enough to see improvement and progress, but short enough to feel that you can accomplish a goal.
I can assure you that if you commit to creating your art for 30 days—whether that’s writing a blog post, making a piece of art, doing a small video, etc.—when you emerge you’ll have a MUCH better idea of what your unique tone and style is. But the key is sticking to it and finding some sort of accountability to keep creating.
Now, consistency is fantastic and I definitely recommend giving yourself a time frame or some sort of parameters to your creative process. However, there’s just one caveat to that strategy that I have to mention.
As much as it’s important to hone your skills and refine your voice as it sits right now, you also have to be aware that your true creative voice might be just on the other side of your current comfort zone.
I think of it like this: Many big Fortune 500 companies have their formula for how they run their business and how they grow year after year. Each year it’s their goal to execute this formula well and keep that growth alive. However, the really good companies have something like an “innovation” budget or department.
The goal of this line item is to keep pushing the envelope, to keep seeing what’s possible. You have to view your creativity the same way. Yes, it’s your intention to cultivate your voice as you know it right now and to keep honing your craft (see #3 above). BUT make sure you leave room for growth and innovation. Make sure you’re experimenting too because that could lead you to something that’s truly original.
Try a new medium, think outside your typical box, explore a completely different style than you’re used to once in a while. This will give your creativity the breath of fresh air it needs to come to life.

Self-doubt is the thief of art and of growth. If you really want to explore your creative muse, you have to convince her that she’s safe. Create an environment in your own mind where no idea is a bad idea. This is easier said than done, sure, but it’s the only way to truly push the boundaries and see what your inner creative voice is telling you. Maybe 90% of the art you make during this exploration phase is crap. And that’s okay. Why? Because that 90% could lead to the 10% that’s pure gold. Write with abandon, make art that doesn’t make sense, do it all FREELY and know that eventually you’ll find the inner voice inside.
There you have it, my five top tips for uncovering your unique creative voice. The underlying theme here, of course, is simply this: get out there and make more stuff.
Create from your heart, from what you feel, and not from what you think other people will like. That’s when you’ll stumble upon what makes you truly original.