Get monthly coaching and support to FINALLY gain momentum in your business without burning out in the process. 🦄 Learn more about WAIM Unlimited.
I’m constantly using online courses to acquire or improve my skills with design programs, web design, marketing and web development — all valuable things that I’ve used to build and grow a profitable business.
And I’m not the only one.
With the explosion of information available to us online, I’ve noticed a huge increase in learning resources available to those that want to learn new things over the past few years — just look at the success of sites like Skillshare and Lynda.com.
This fact is actually very good news for you and me because as the increase in demand for online learning increases, so does the opportunity for people to make a living by sharing their talents and teaching others.
And I’m not just talking about online courses that are $500+. You can make money with small and affordable classes too.
This revenue stream has been so impactful for my business that I was able to stop taking on client work altogether, something that I didn’t truly enjoy as much as I enjoy building resources for soulful creatives.
Since making this change, I’ve been able to shift my business in a way that I feel is more authentic to who I am. I get to help a lot more people on a regular basis. I get to constantly come up with new ideas and execute on them. I get to enjoy the process of thinking through how to teach a new idea to someone. Overall, I feel freer and more flexible to design my days the way that I want (as opposed to designing them around client deadlines.)
And I’m hoping they might be able to do the same for you.
Now, I remember what it was like when I started building my first e-course. It was unbelievably overwhelming! I remember thinking… Where in the world do I start?
I’m hoping that this post will be the answer to that question for you.
I’m going to take you through every single step in the process to building (and selling!) your first online course.
Now, while I think this post is incredibly thorough, by no means am I saying it’s exhaustive. Meaning… YOU have to figure out what works for you. If you don’t want to do things exactly as they’re outlined below, well more power to you!
The purpose of this post is to provide you with some structure to simply get started. Ultimately, though, you have to seek out and choose the best resources and processes that feel right for your business.
Just to reiterate: this post is not a “how I got rich on the internetz and how you can too” post. E-courses are NOT a get rich quick scheme.
They take a lot of work to put together, and there are no revenue guarantees. HOWEVER, if you enjoy teaching and sharing your gifts with others on a one-to-many scale, e-courses could be an excellent way for you to create real revenue doing something you love. And that is my ultimate goal — to help you design a business and a life that is as vibrant and authentic as possible.
So, without further ado…. Let’s get into it!
Online courses are, simply put, just another way to share information or your skills. They can get a bad rap because some people are sleaze-balls and make crappy things in life. But the same thing can be said about terrible websites, spammy e-books, and blogs with 47 email capture popups. The key is to focus on making something great and something you know will help other people.
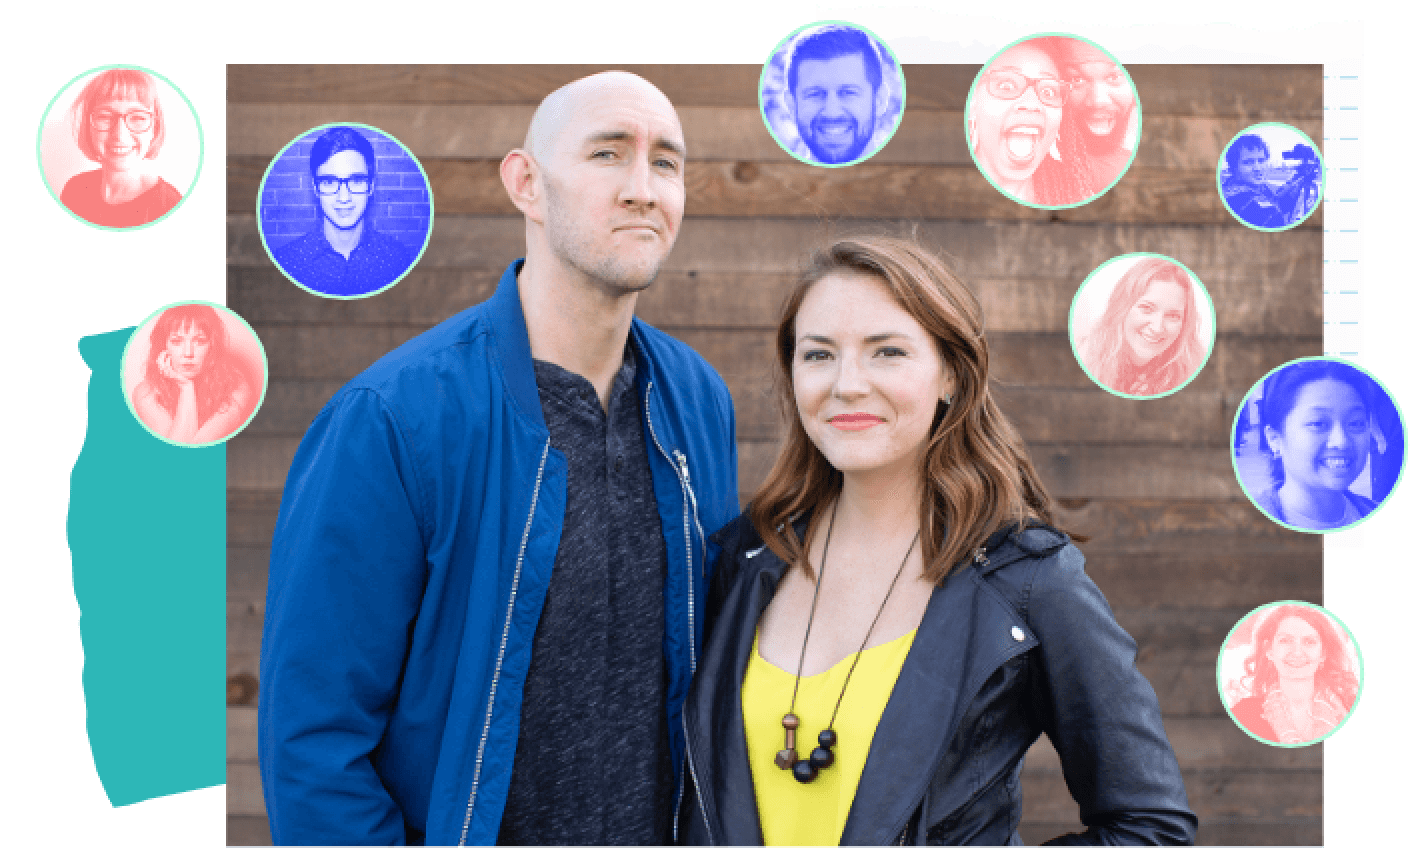
My husband Jason and I believe that everyone has something to teach. There’s no doubt in our minds that you’ve cultivated some expertise in your life and you could share that with other people. An online course may be the perfect vehicle for that!
Simple steps to ensure you create a great e-course:
It’s only fair to play the other side of the fence here as well so what are some reasons you shouldn’t make an online course?
As a society, we’re so quick to jump at a new project or opportunity. We get immediately wrapped up in all the amazing potential! But, as with every new thing, the potential is not guaranteed results. Even if you’ve created an online course before, it doesn’t mean the next one you create will be a smashing success.
Wrapping up this section on if you should/shouldn’t create an online course, if you can answer YES to these six questions, then you absolutely SHOULD create your own e-course:
If you answered yes to every question—and you must answer yes—then congrats! You should build an online course!
Here’s a quick aside from my husband Jason when he was wrestling with self-doubt before making his first e-course (which, spoiler alert, went on to make $100,000 in just three years):
When I set out to create my first online course in 2013, I had absolutely no clue what I should teach. I knew I wanted to move away from trading time for money, but I didn’t know where to start. A friend of mine gave me some great advice in the form of a question. He asked, “What’s something you have experience with that you could share with other people?”
My self doubt immediately crept in and told me, Nothing! I’m not special. I’m not a teacher. Why should I create an online course? These thoughts are normal, and they continue to come to the surface every time I think about creating a new online course. The first time around, that self-doubt lasted a couple of weeks before I realized I had quite a bit of experience in landing paying sponsorships for projects. Over 1,600 paying sponsors, to be exact. There had to be something I’d learned during all that experience and some processes/tactics I could share.
And there were! I created an online course called How To Get Sponsorships For Anything. That course was my starting point, and three years later, it’s brought our household $100,000 in total revenue. Take that self-doubt!
There is something unique about you. There is something you know better than most people. You are full of interesting ideas, thoughts, opinions, and experiences.
No surprises here! Before you start building a course, you’re going to want to figure out what you want it to be about. It’s important that you feel comfortable enough with your topic that you have plenty of information to share on the subject. As a personal preference, I like choosing topics I have some extensive personal experience in so that I don’t have to go off and do a ton of research on my subject; instead, I can simply teach from a place of personal knowledge and experience.
Here are some guiding questions to ask yourself as you brainstorm your e-course topic ideas:
Speaking of that last one, let’s talk a little bit about demand.
Now, like I said, building an e-course is no easy task. There is a lot of time and energy that will go into building your course, so you want to make sure that the juice is going to be worth the squeeze, right? You want to make sure that your course topic is something that people will want to learn (and something they’ll pay you for!) That’s where the idea of “product validation” comes in.
See that dandy email sign up form at the top of this post? With every big blog post that I think could be an interesting product idea, I make sure to include one of those at the top and bottom so that 1) I can start capturing a list of interested people that might purchase a course on that topic, but also so that 2) I can gauge interest on that particular topic. If I put up the blog post and no one enters their email address (or very few do) then I know the juice is likely not worth the squeeze and I move on to the next course idea.
Here’s a post where I talk much more in-depth about how I use product validation to know which product ideas will bring me revenue: [How To Know Which Product Ideas Will Bring You Revenue]
Sometimes you’ll find that what you think people want, they’re not willing to pay for. For instance, I had this idea for a daily Photoshop tip email and I set up an email capture on a post with other Photoshop tips. It’s been almost 5 months and only 50 people have signed up saying they want that product. To me, the effort to build it wouldn’t be worth the revenue it would likely bring so I scrapped that idea.
Here’s a look at the in-post sign up form:

Product validation is your assurance that you’re spending your precious resources (like time, creativity, money) on something that will bring your business substantial revenue.
The lesson here: Don’t choose your topic assuming that people want an e-course on your subject. Make them prove to you that they want it by requiring them to opt-in somehow.
Once you’ve settled on a topic, you want to loosely outline the lesson topics and course content.
At this point in the process, I simply start with a blank Google Doc and start cranking away, typing everything I can think of related to my course topic. In these beginning stages, I’m not worried about lesson titles, the order of content, or even whether a particular thing fits into the course or not. This step is all about getting the knowledge and information out of your head and onto digital paper.
I usually start with a bulleted list and just type out points or questions under the umbrella of my course topic. Once I feel like I have a good amount of bullets, that’s when I take a step back to ask myself what order the information should go in. That’s when I go back through each bullet, cutting and pasting them around until the bullets are re-ordered in the most logical, step-by-step progression.
Remember, you want to think of your course content as building blocks. Ask yourself what basic information might form the foundation for more complicated information. This will help you get clear on the order the course content should go in.
This is usually a good point to walk a friend or peer through your outline to see if it makes logical sense to them. Sometimes when you’re so close to something (hello, you’re likely already an ace at whatever you’re teaching) it can be hard to see the holes in your content — the parts where a newbie might get stuck. Getting feedback could be crucial to spotting those holes early. (Even better, think about how you can get feedback from someone who is similar to the type of person you’re targeting with your course!)
Once you feel comfortable with the order of information, think about how you could organize it further into a course format. Start to pay attention to how information can be grouped together to form lessons, modules, chapters, etc.
For example, the Better Lettering Course is set up as six lessons only, each with a different topic about hand-lettering. The Better Branding Course, on the other hand, is much more in-depth and has a lot more information (27 lessons total.) That could easily be overwhelming to someone, so I’ve grouped those 27 lessons into four modules, each to represent a different step in the branding process. This organization helps make the course content more digestible.

Your lesson here: Come up with a course outline that includes all the lesson topics you want to cover, and organize them in a way that will make sense to someone learning about your topic for the first time.
Once you have your basic lesson topics written out and organized, that’s when you want to go back through and fill in content for each section.
You can write as little or as much as you want for each section, but it’s probably a good idea to think ahead a little bit in terms of how you might want someone to experience the course.
Writing is a strength of mine and the way that I organize my thoughts best, so I like to go through and write out each section as if it was a blog post like this one. This approach not only forces me to explore each lesson topic in-depth (making me more prepared when it comes time to record my videos,) but it also allows me to easily convert the course content into an e-book if I want to sell that separately at a later date.
Here’s a screenshot from my original outline document once I went back and filled in the course content. I like to format the Google Doc so it becomes clear to me how to structure my slides once I make them for the course videos:

Now, that might not be the case for you. The idea of writing all the content out for your course might be intimidating or overwhelming, so maybe instead you just want to continue adding bullets and sub-bullet points to your outline to get more specific with your information.
If you know you want your course to be videos with slides (no written portion), then it may not be necessary to write out all of your course content line by line. You could just use your bullets as points on your slides. Do what feels most natural for you so you can set yourself up for success in terms of creating the actually content, which is the heart of your online course.
Your lesson here: Keep adding content to your outline until you feel you’ve successfully written the content of the course in whatever format makes the most sense to you.
After I have an idea of what the course will be about but before I begin work on actually building the lessons, that’s about the time that I start figuring out an overall look and feel for the course.
I typically go with something that feels somewhat consistent with my umbrella brand (now Wandering Aimfully, previously Made Vibrant), but with a twist so the course has a bit of brand identity on its own. I also always create some sort of identifying logo, along with loose brand style rules so the design of the course remains professional and consistent throughout.
Funny enough, the logo for the Better Branding Course actually came from of a rejected logo concept for a design client. I loved the idea of the diamond being made up of connected points. In the course I talk a lot about how the seemingly different elements of your business and personal story can be connected by a single conceptual thread that forms your brand. The diamond visual was great at reinforcing the content in the course, so I decided to use it in the Better Branding Course logo.

I created a quick little style guide using the MV brand colors (plus that fun pop of purple) and I used this guide when designing my sales page and Keynote slides for each lesson.
In a course with multiple modules, I also think it’s helpful to “assign” a color to each module as a way for students to quickly recall what module a particular video was in or to easily match certain resources with certain modules.

Speaking of Keynote slides, that brings me to the next step…
Woohoo! If you make it to this point and successfully create the course content, you will have made it over the hump!
Then it simply becomes a matter of packaging up that content in a way that is easily accessible for your students. That’s what these next two steps are about — figuring out what medium you want to use to teach your course and deciding how to deliver the course content to your students.
When it comes to online course content, I think there are three main ways to teach: video, audio and written content. In both my courses, I use a combination of video and written content, but let’s go over each one to help you decide what you want to use.
Video is my preferred method of teaching because it combines the visual component of images/written content with the ability to add personality and context in your voice.
I’ve seen video used in primarily two different ways: with the teacher on-screen or the teacher off-screen.
If you decided to teach on-screen, the benefit is that your student gets to experience your full personality and engage with you in a meaningful way. They can see the expressiveness in your face as you talk and that goes a long way in getting them excited. If done right, in a professional studio (similar to how Treehouse does their videos or how Marie Forleo teaches in her weekly MarieTV videos) then the result feels professional, high-quality and personal.


As a drawback though, going this route can be expensive and time-consuming because not only do you need the quality equipment to do it well, you also have to nail your lesson scripts.
If you don’t have the cash or access to a professional studio, but you want to utilize the personal feel of on-screen video, you could have a friend with a nice camera shoot you on a colorful, interesting background and think about doing maybe a quick video introducing yourself and welcoming people to your course.
Teaching off-screen, however, can still be effective and can be more affordable if you don’t have access to a professional camera. You can record your voice as you teach with the help of Keynote/PowerPoint slides. This will allow you to edit the audio, meaning that even if you don’t record a lesson perfectly all the way through, you have the ability to edit out your mistakes.
I’ll be honest, either video option is ultimately pretty time-consuming, but in my opinion, it provides the most comprehensive and immersive learning experience.
Think of this option as delivering your course content like podcast episodes. Similar to video, audio allows you to inject your personality into your teaching and gives you the flexibility to edit out your mistakes. However, if you’re trying to teach on a topic that is very visual and relies on things like images for understanding, this wouldn’t be a great route for you.
Whether you decide to go with video or audio, making a small investment in sound equipment like a simple lavalier microphone (lav mic) will go a long way in the perceived quality of your final product.
If you’re not comfortable in front of a camera or recording your voice, you can always try a written-only course. You could put your course content in daily emails, slide presentations or a series of PDFs. While you may lose a little of that personal connection with your students, the time and money investment are certainly much lower than going the audio/video route, so if you’re on a tight budget, written-only is a good place to start.
Since both of my courses are primarily video-based, I’ll share with you my process for building and recording my video lessons.
First, I started by taking my written content from Step 3 and using it to build a Keynote presentation.
I love using Keynote because I can easily create Master Slides with branding/typography settings and it makes it really easy to add new slides in the style I want. I also love the image editing tools, and the fact that I can really easily export to PDF, which allows me to offer my students the ability to download each lesson’s slides as a PDF.
I created an “appear” action for each bullet point just because as I talk over the slides, I don’t want students to tune me out in an effort to read the bullets. Instead, the bullets are used as a reference point and the real meat of the teaching comes through in my audio (you can see that in the video lesson below.)
Once I created all the slides for every lesson, then it was time to record my videos. First, I plugged in my lav mic to my laptop to make sure my audio would be better than my Macbook built-in microphone.
Then, I opened QuickTime Player on my Mac, hit File > New Screen Recording, clicked the red record button in the pop-up window, and I clicked anywhere to record the whole screen. (If you’re using a lav mic, click the drop down arrow next to the record button to make sure your audio input is set to your mic.)


Then, I hit Play on my Keynote presentation to make it full screen from the point at which I wanted to record. At that point, I started talking over my slides and teaching my lesson. As I clicked the right arrow, it cued my bullet points to transition, just like you would do if you were giving a presentation in front of an audience.
Now, I don’t always say things perfectly. Some people might choose to read a script so they know exactly what they want to say minus the ummms and ahhhhs. For me and the style of teaching that I want in my courses, scripts simply don’t work. I want my courses to feel natural and friendly, like talking to a friend over coffee, and so I’m okay to sacrifice a few moments of my silly, unscripted interjections in order to maintain that authenticity.
Luckily, I also have a video editor on hand (my life partner, Jason) who edited all my videos for the Better Branding Course. Jason taught me the basics of iMovie so that I could edit my own videos for the Better Lettering Course, but since there was a lot more content this time around a higher price point, I knew I wanted the videos to be edited by a professional (luckily a professional happens to live under my roof.)
f you decide not to do video, you want to apply the same basic concept of this step to whatever your medium is at this stage. This part of the process is all about formatting your course content in the medium you choose.
If it’s audio, record those lessons as audio files on your computer (and edit, if needed.) If it’s emails, start writing each email in a Google Doc or laying out each PDF in your design program of choice. This step is all about presenting your lessons as they’ll be consumed by your students.
Your lesson here: there are multiple different mediums that you can use to teach your course. Ultimately, you want to choose the medium that you feel most confident with and the one that best communicates what you’re trying to teach.
Decide how you’re going to deliver your course content and get your course ready for students.
Now that you have all your fancy lessons in whatever medium you want, you have to ask yourself: where is my course content going to live and how are my students going to get their hands on it?
Both excellent questions! Let’s first dive into where your content will live online…
Video and audio files must be hosted somewhere online before you can make them accessible for consumption. There are a few different ways to make this happen.
My first time around for the Better Lettering Course, I decided to upload my finished video lessons to YouTube and set them as “Unlisted.” This means that only people with the video link (my students) can view the videos, and the video won’t show up in Google’s search results. The course platform I use (which I’ll go into more below) allows you to embed videos, so by using this feature on YouTube, I was able to essentially host my private video content for free.

To upload my videos, I first setup a YouTube account (which you technically should already have if you have a Gmail/Google+ account.) Then I hit Upload and dropped in my mp4 file (making sure to set my video as “Unlisted” like I mentioned above.)

Once all my videos are uploaded, I can use the embed feature to drop the embed links for each lesson into my course platform of choice (more on that below!)
For my second course, the Better Branding Course, I wanted the video player to look more custom and a bit more professional, so I opted to go with a service called Wistia. Wistia basically creates a white label media player for you which allows you to host your videos, customize your player overlay and upload custom thumbnail images to your videos. The result is something that appears a bit more modern and high-quality than the YouTube player.

Wistia is a paid service, however, so if you’re planning to keep your e-course at a lower price point or if you’re trying to keep costs low, the free YouTube hosting route is certainly a viable option.
For hosting audio files, I really like SoundCloud. I love the way their embeddable player looks and functions, and the fact that you can customize things like the button color. Jason has a course about securing sponsorships for podcasts, and he uses SoundCloud to host audio interviews inside his course dashboard. Here’s what that looks like:

Speaking of course dashboards, once you have your content uploaded and hosted, you’re going to need a place for people to access your e-course!
Full disclosure: my husband, Jason, co-founded a course platform called Teachery when he realized there weren’t any easy, turn-key but customizable course platforms out there. Teachery is what I use to host both of my e-courses.
Now, I know I’m biased, but I really do believe this platform is the best option for creative entrepreneurs that want a robust way to host a custom course without any WordPress or technical know-how. You can literally start building a course in minutes and it has some awesome built-in integrations with Stripe and Mailchimp.
The Teachery platform allows you to build your course and then connect it to a custom URL (like… “www.handletteringforbeginners.com”, for example) with a customizable “dashboard” interface for your students that looks like this:

And here’s what it looks like inside a lesson with my course videos from Wistia embedded:

My favorite part about Teachery is that they handle all the complicated stuff like setting up user accounts (for your students to login), processing payments (securely!) and capturing email addresses of those students.
I especially love how easy it is to manage multiple courses at once and keep up with new students as they purchase.
Here’s what my Admin dashboard looks like on the back-end of Teachery:

And then here’s what it looks like when I’m editing my course:

For me, it takes the effort out of setting up my course so I can focus all my time and energy on the content and experience that my students get.
Here are just a few reasons why I feel Teachery is the best option for me:
If you’re a technology newbie but still want to create a video/audio course, I can’t recommend Teachery highly enough.
If you want a written-only course and want it delivered to people in a series of emails, I’d recommend using Mailchimp and setting up an automation sequence to drip content. While I’ve used Mailchimp’s automation before, I’ve never used it as a course delivery method. Here’s an awesome post by Paul Jarvis that details how to set up a self-paced email course using Mailchimp automation, better than I’m sure I could explain it. If you’re interested in this option, I’d give it a read: [How To Create A Self-Paced Email Course]
There are certainly A LOT more options than just Teachery or Mailchimp, and I know there are some WordPress plugins that offer the ability to build courses within your existing WordPress site. My advice is to do a little bit of research to find out which course delivery option works best with your technical skill level and the course experience you want to create.
OR… don’t do any research and just use Teachery because it’s awesome. It’s totally up to you. 🙂
If you DO decide to go with Teachery, they’ve created a FREE course walking through exactly how to set up your online course on the platform (yep – it’s a course about a course. SO META.) [ How To Build A Course In Teachery ]
Your lesson here: Choose the hosting method and course platform that fits your budget and technical skill level. If you don’t want to spend time and frustration setting up a password protected area of your website, use a third-party platform like Teachery.
Once I have my course built and ready for students, I also think about any additional resources or features that would be a nice draw for the course.
For example, the usefulness of the information in the Better Branding Course relies on the students’ willingness to apply the principles to their own business. That’s why as a part of the course, I created over 15 worksheets and templates for them to complete and use throughout the course.

For the more complicated worksheets, I created them using InDesign, and then for the simpler resources (like the Brand Elements Checklist), I used Keynote and exported to PDF.
I uploaded each worksheet PDF to Google Drive, and created automatic download links at the bottom of the lessons they pertain to. When a student clicks the link, the PDF downloads right to their computer. They can edit the PDFs digitally, or they can print out the resources and fill them out that way.

This is also the point where I start to think about things like on-boarding. On-boarding simply refers to the process of getting new users (students) integrated into your existing system (course.) I want to make it as easy as possible for students to go from the moment of purchase to diving head first into the course. That’s why I created a “Getting Started Guide” which is automatically emailed to new students upon purchase (this Welcome Email feature is another reason I love Teachery.)

The guide walks them through how the course works, the layout of content, and how to interact with other students using our community chat app, Slack. (For an in-depth post on how I set up the Better Branding Course Slack community and why I LOOOVE it, click here: [ How To Set Up A Slack Community ]

Your lesson here: As an option, this is a good time to think about how you can enhance the experience of your students beyond just the course content with bonus features like worksheets, on-boarding, and a course community.
This is the home stretch, friends! Once you have your course built, it’s time to market it and launch that sucker! Here are a few things you’ll want to consider as you figure out how to make your course appeal to potential buyers.
Hopefully by this point you already have a great idea about who you’re building this course for. Even better, maybe you already have an actively engaged audience that’s excited to buy just as soon as you launch. The reason you want to get super specific and clear about your course audience is so that when it comes time to write your sales page or promote your course, you know exactly how to position your course so that it appeals to the people it will benefit.
Here are some questions to ask yourself as you nail down your course audience:
Use the answers to these questions to position your course and to think of places you can promote it where your ideal audience hangs out.
Pricing can be a sticking point for a lot of people (I know it can be for me) because it’s hard to know what someone will pay for what you create, or the value that they’ll feel your course is worth. That’s why I think you have to ask yourself a couple key questions to get a general pricing range that is logical, and then you just have to go with your gut.
Think about your target audience. Now, ask yourself these questions to determine your pricing:
I will say, a lot of pricing/marketing information online will remind you that pricing your products high means you need to sell less to hit your overall revenue goals. And that’s certainly true. BUT I will say that there’s also a time and place for low-priced products, and if you create the right info-packed course at a low price point for the right audience, you can still make real money (my $20 lettering course being an example of that.)
Something else to keep in mind: you can always add content to your course and raise the price, but you probably don’t want to have to drop the price to get more sales (your early customers likely won’t take very kindly to this.) That’s why I always start with my lowest, best possible price and then if I add modules/content in the future (which I have done with both courses), then I feel I can ethically raise the price to reflect the new value of the course.
Before your course is ever launched, you want to start warming up the audience you do have and letting them know what you’re working on. You also will likely want to start collecting emails of people who are explicitly interested in buying your course once you launch. I usually set up a simple landing page on my website explaining what the course will be about along with an email capture to start building a pre-launch list.
Whenever I’m building a product, I also like to share the experience on social media so that people can actually get a behind the scenes look at the process of creating something (and this, of course, provides double duty by reminding people that the course will be coming out!)
I’d recommend starting to tease the launch of your course AT LEAST a month in advance of launch, if not two months before. This will give people time to understand why you’re creating the course and it will allow you to build up a healthy list to launch the course to.
Your lesson here: Figure out who your online course is most valuable to and then come up with a price for your course that feels appropriate to that audience and the content you’re offering. Then, start prepping your audience and gathering a list of people that would be interested in purchasing the course before it launches.
Hooray! You made it! Your course is a living, breathing thing and now it’s time to put it out into the world. Before you officially launch, though, you’re going to want a place to send everyone. This is where your sales/landing page comes in!
Sales page design can be another sticky point because there are just SO many ways and strategies to grab someone’s attention and tell them about the course. I recommend starting with something that VERY clearly speaks to your ideal audience and the pain point that your course will solve for them. Here’s the top of the Better Branding Course sales page which speaks clearly to my ideal audience: creative entrepreneurs who are NOT designers.

After that, you want to give people an idea of what they’ll get when they purchase your course and what the end result will be when they complete it. It can also help to include any credibility-building points like why you’re qualified to teach someone your course topic. Lastly, of course, you want to include multiple opportunities for someone to select the buy button and go straight to your order page.
As you design your sales page, ask yourself: Does this web page clearly explain:
Once your sales page is designed, it might be a good idea to ask someone that has little to no idea of what your course will be about to scroll through and see if they understand clearly what you’re trying to communicate.
BONUS TIP: Make sure you test the checkout process! The last thing you want on launch day is for people who want to buy your course to somehow have an error or issue when they’re trying ot pay you!
You also will need to decide how long you want your course to be open for enrollment. Do you want the course to always be for sale (like my $20 lettering course) or do you want it to be for sale just once a year (like Marie Forleo’s B-school)?
OR… do you want it to be for sale for limited periods of time throughout the year, like the Better Branding Course which is open for 48 hours once a month?
There are benefits and drawbacks to each one of these options that you’ll want to consider. The downside to having a course always for sale is that someone who lands on your sales page doesn’t feel a sense of urgency to actually purchase. It’s easy for them to say, “Oh I’ll come back and buy that later.” The upside to that though is that if someone does land on your sales page, they can buy right when they have the impulse and you get paid consistently throughout the year. (I especially like this for the Better Lettering Course because I now can count on that product to bring me a fairly steady amount of money each month, something that was certainly a nice change of pace from the ever-erratic design client world!)
The benefit to limiting the duration of your launch window is that the sense of urgency could put some potential buyers over the edge to purchase for fear that the course won’t be open in the future. This is especially true if you do a big launch just once a year. If someone knows they’ll have to wait an entire year to get into the course, that’s a pretty compelling reason to buy during the small launch window. The drawback is that you might be losing some sales because if they find your course when enrollment is closed, it’s possible that they’ll lose interest by the time it’s open again. Also, if you launch just a few times a year, your revenue comes in all at once rather than in increments throughout the year. It’s a bit harder to predict your cash flow for your business if that’s the case.
Remember, you can always test one of these options, learn, and then change down the road. Right now, the monthly launches for the Better Branding Course are working well because I like focusing on a small number of students and helping them through the course, without worrying about new people starting all the time. However, I haven’t ruled out the option of opening the course up completely in the future. Only time will tell!
Once you know how long you want your course to be open, pick a launch date and mark it on your calendar!
Sales page, designed! Launch window, decided! Launch date, picked! Now it’s time to tell people and get some new students!
Now, this by no means is an exhaustive list of all the various ways you can promote your course, but these are the main ways I promote mine.
Remember that pre-launch list? Now it’s time to put it to use! Those people have already raised their hands to say they’re interested in what you’re selling. A week before your launch, send them an email letting them know the launch date and how they can purchase. Then, the morning of launch, send an email letting them know it’s the big day! In that email, don’t just send them a link to your sales page (remember, they already said they want your product!). Be sure to include a direct link to your order page so they can purchase on the spot, as well as a link to learn more on your website.
If you have a main email list, you’ll also want to prep them and send them an email on launch day as well. Don’t overload your list with too many sales emails, but remember, this is likely your most engaged promotion vehicle because they’ve opted in. Don’t sell yourself short by sending only one email and then wondering why you didn’t get more sales.
You likely already have some people visiting your website. Make sure it’s clear to them no matter what page they land on that there’s a product launch going on and direct them to your sales page. I do this through Squarespace’s Announcement Bar which sits at the top of my website during my launch period.

I’ve never used the live webinar/free video series strategy to sell products, but I’ve seen it work for other entrepreneurs. The idea is to lead with free content (like instructional videos or a free webinar) that people have to give their email addresses to see, and then you can try to convert those people to sales of your course. Hilary Rushford uses this strategy for her Instagram course. She teaches a free class with something like 15% of the content from her paid course and then converts the webinar attendees to purchasers.

In all honesty, I don’t love the feeling of this method. It feels a bit bait-and-switch to me, BUT that doesn’t mean it can’t work and that certainly doesn’t mean it can’t be authentic. I’m still brainstorming on ways to test this promotion method in a way that feels good to me. Let me know in the comments if you’ve seen anyone that does it really well!
My original Hand-lettering For Beginners blog post is still the #1 sales referrer for my lettering course. Don’t be afraid to edit blog posts that get a lot of traffic by adding buy buttons or at the least by adding links to your sale pages.
You can also think about where your ideal audience hangs out online and think about offering to write a guest post for those websites. Adding a quick link to your course in your author byline could get you some pre-qualified traffic. (This method probably works best for a course that has completely open enrollment because you never know when those posts will go live or when they might pick of steam.)
Lastly, of course, you want to use your social media accounts to spread the word about your course. Do yourself a favor and create your promotion images or graphics ahead of time so you’re not scrambling for images when you want to post. And remember, social media is incredibly ephemeral these days, so even if you feel like you’re inundating people on all fronts, only a fraction of your audience will actually see all three of those Instagram posts you shared, and even LESS people will see those multiple tweets. If you share in a sincere and non-spammy way, you shouldn’t worry about oversharing.
There’s also the opportunity to pay for social media promotion like with Facebook ads or promoted pins on Pinterest. This is not something I’ve tested to-date as all my promotion is unpaid, but if you have a smaller email audience and really believe in your course, it might be worth testing!
Your lesson here: Leading up to your launch, come up with a promotion strategy that feels good to you. Remember, you’ve created a kick-ass e-course that will help people, so your job is to get it in front of them. Promote your course with pride, learn from what works and what doesn’t, and keep moving forward.
PHEW! Holy cow, we made it!
I know I shared with you A TON of information in this post, and it might even seem a bit overwhelming right now. However, I invested the time to share just about everything I’ve learned with you because e-courses have quite literally changed my business and transformed my life.
Now I’m able to make money doing something that I absolutely love — teaching — and I get to do it in the way that I want. With the money I made on both my e-courses, I was able to pay off my credit card debt and I’ve taken my business from barely breaking even last year to being on pace to triple my revenue this year.
Here are the revenue stats for my first two courses, which I want to share with you NOT as a way to say, Look how much money I’ve made but as a way to say: With hard work and confidence in yourself, you too can make real money teaching what you already know:
We can all benefit from the knowledge that we collectively share, and there’s nothing wrong with getting paid to enrich the lives of other people with your natural talents.
If you’re a creative entrepreneur and you’re struggling to get some steady, recurring revenue, maybe it’s time to really consider building an e-course.